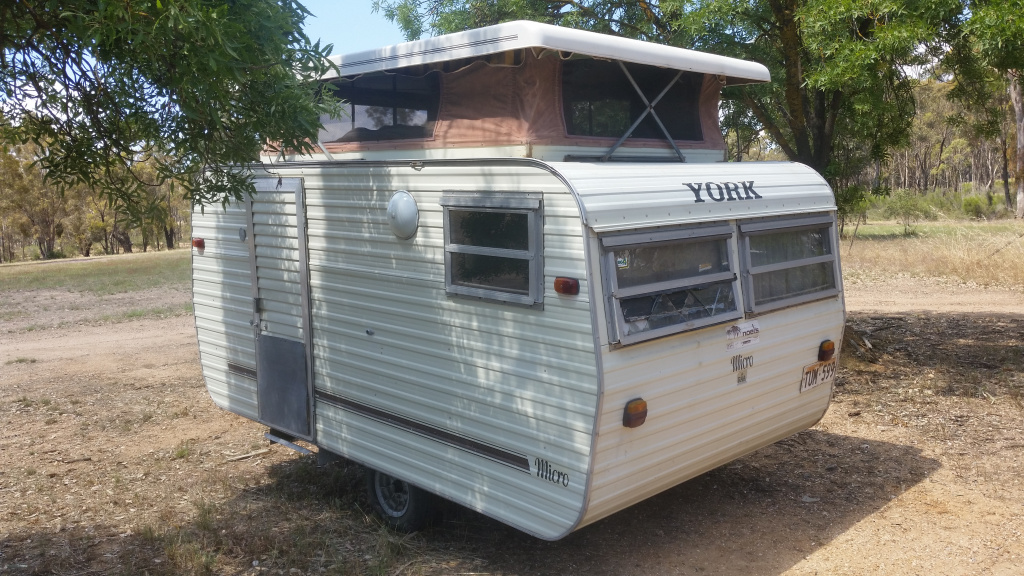
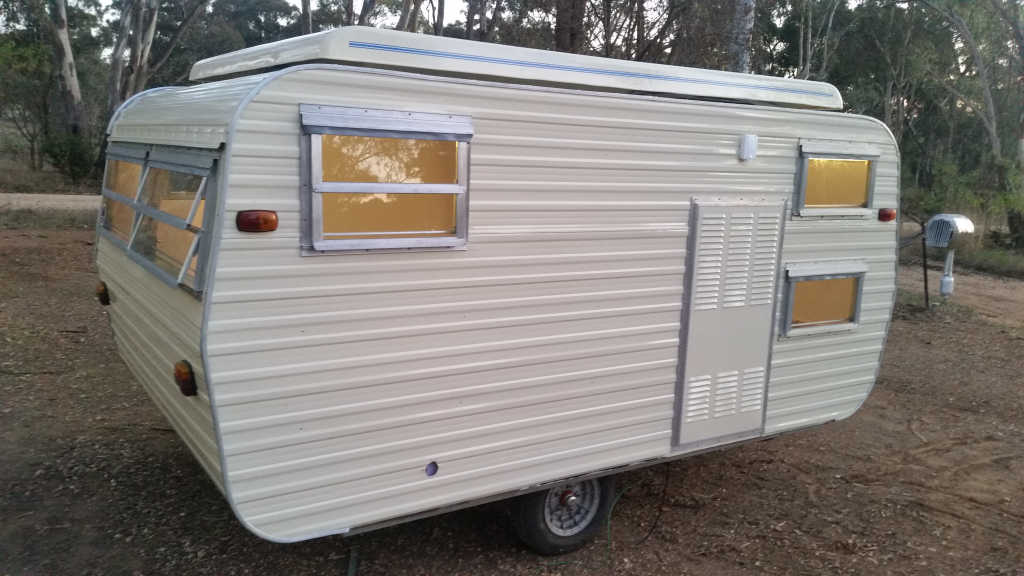
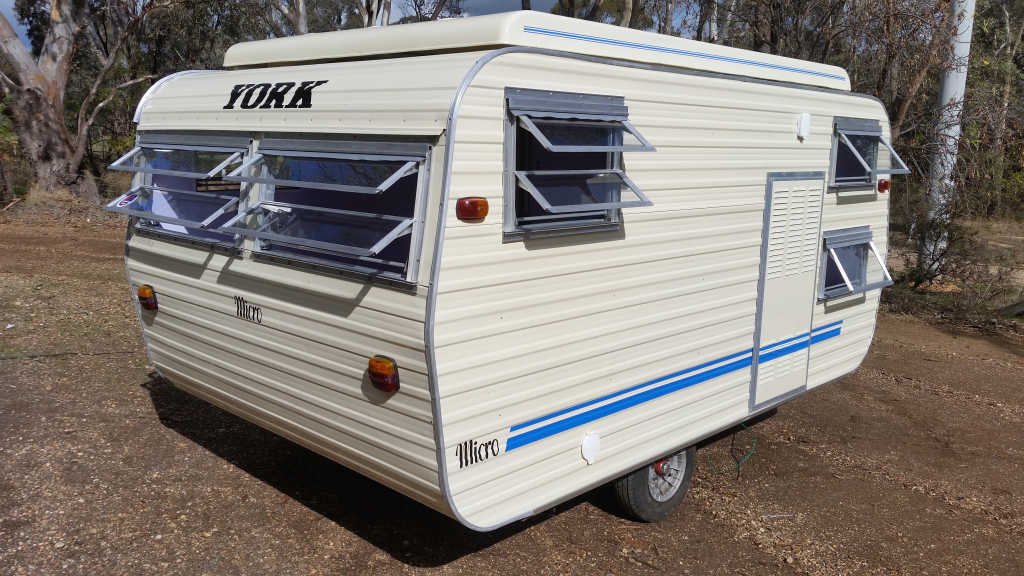
1978 York Micro poptop caravan
The rebuild
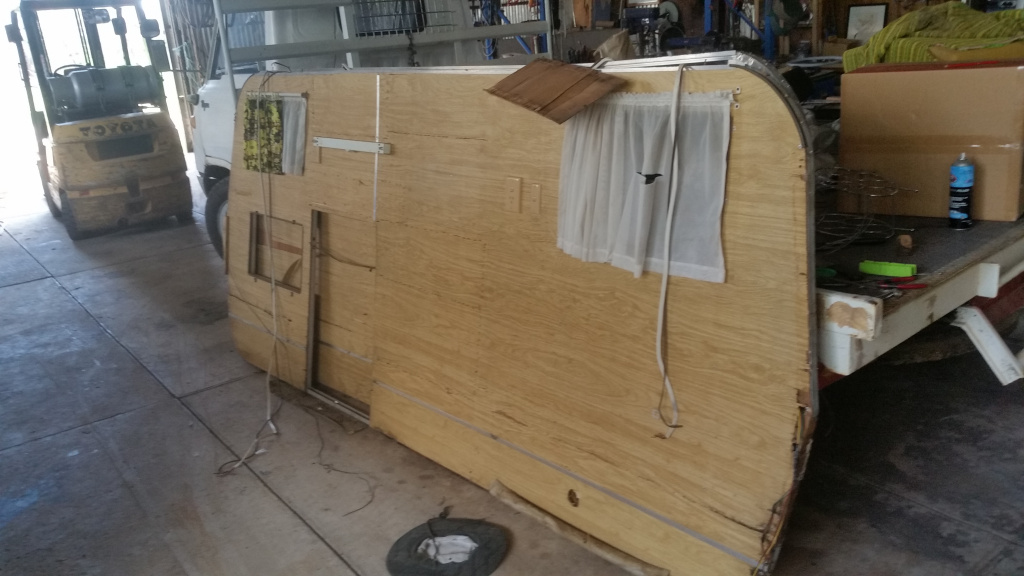
As purchased, the little Micro was quite a tidy van,even after very careful inspection...but things changed!


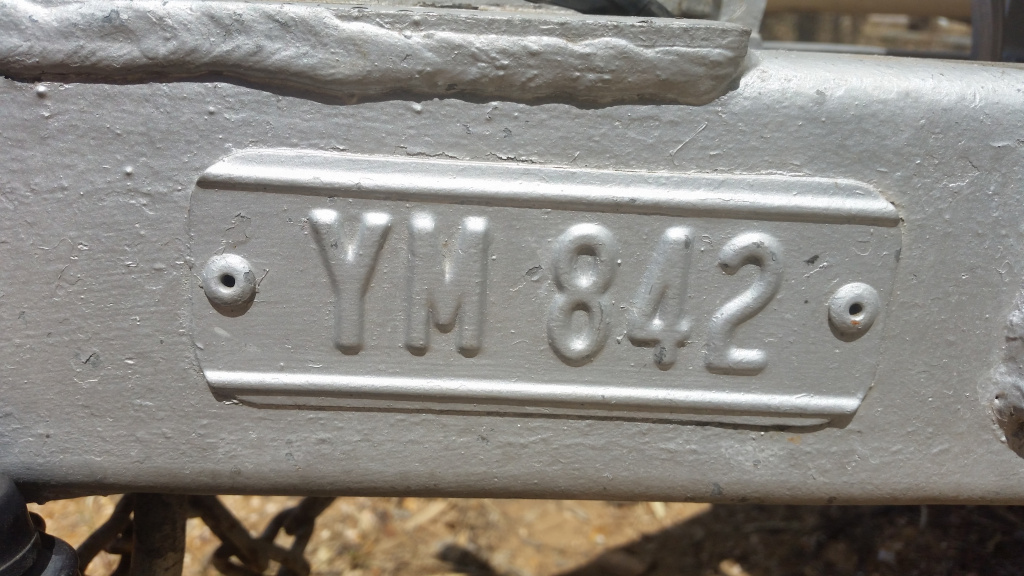
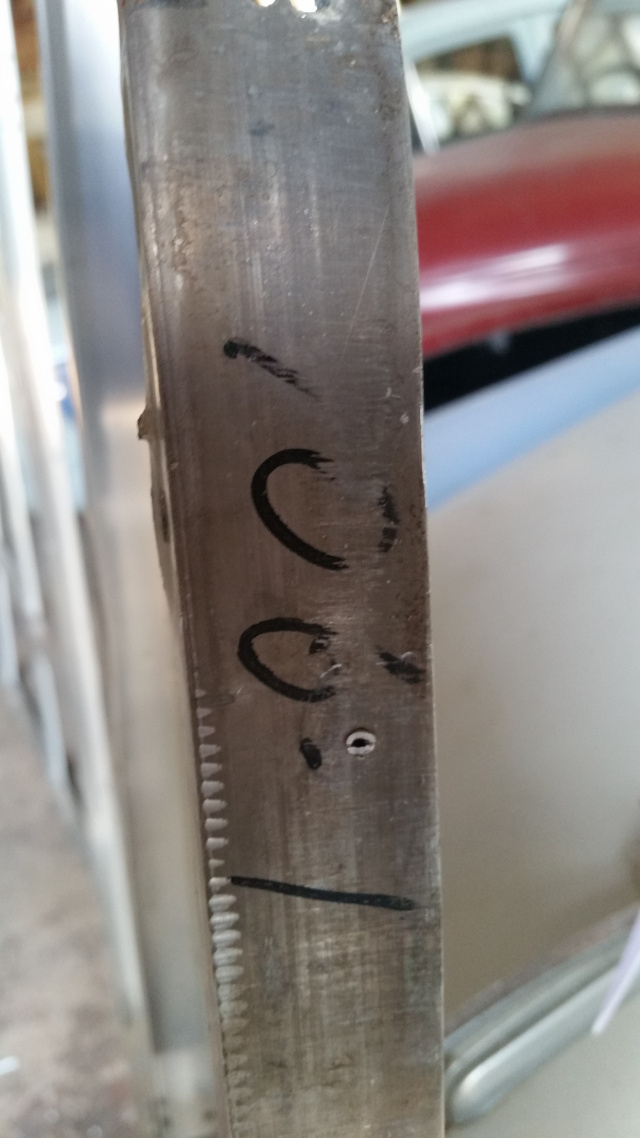
↑chassis number.
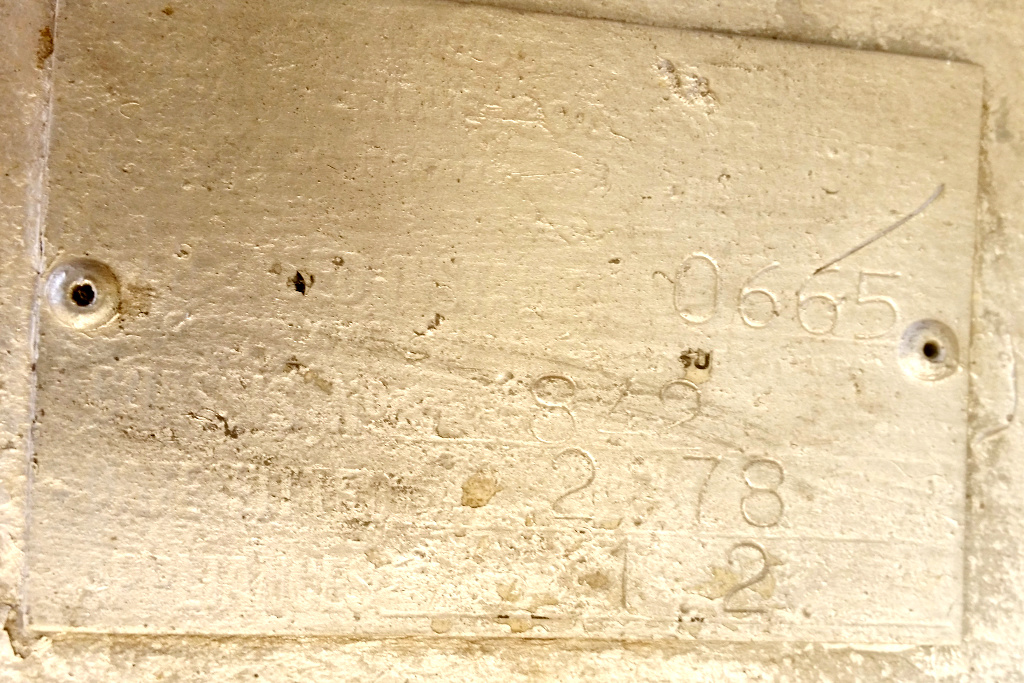
↑build plate.

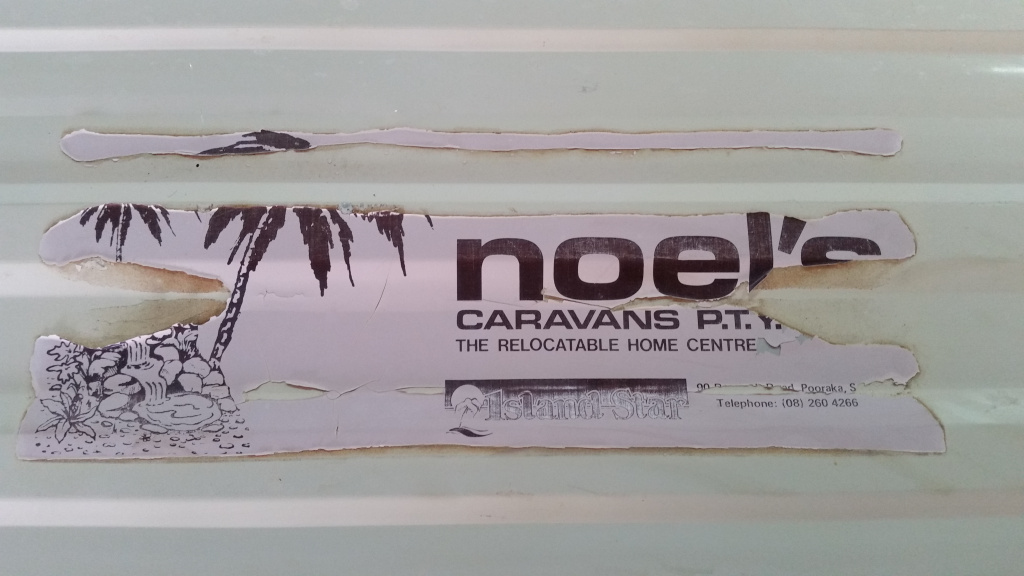
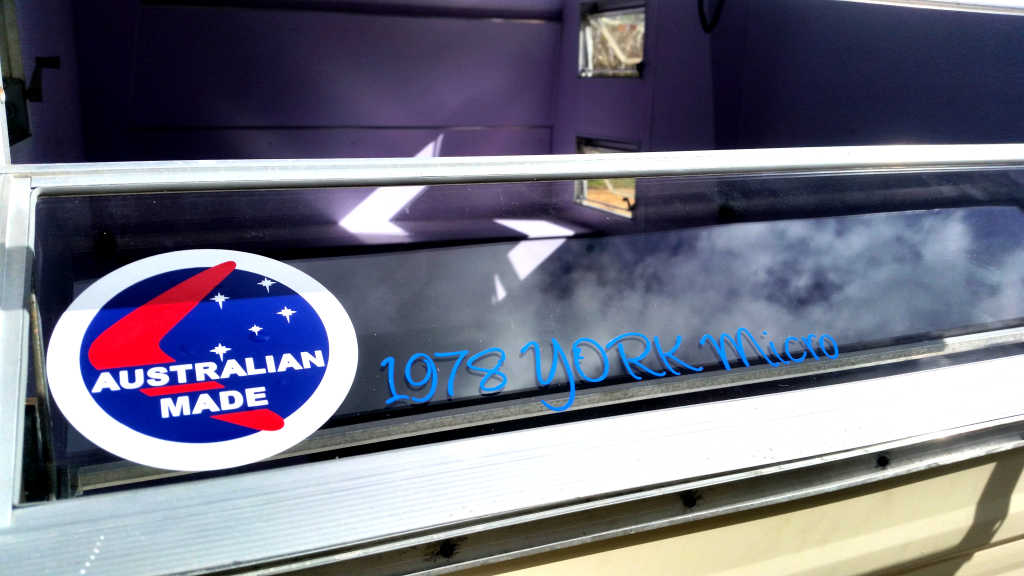
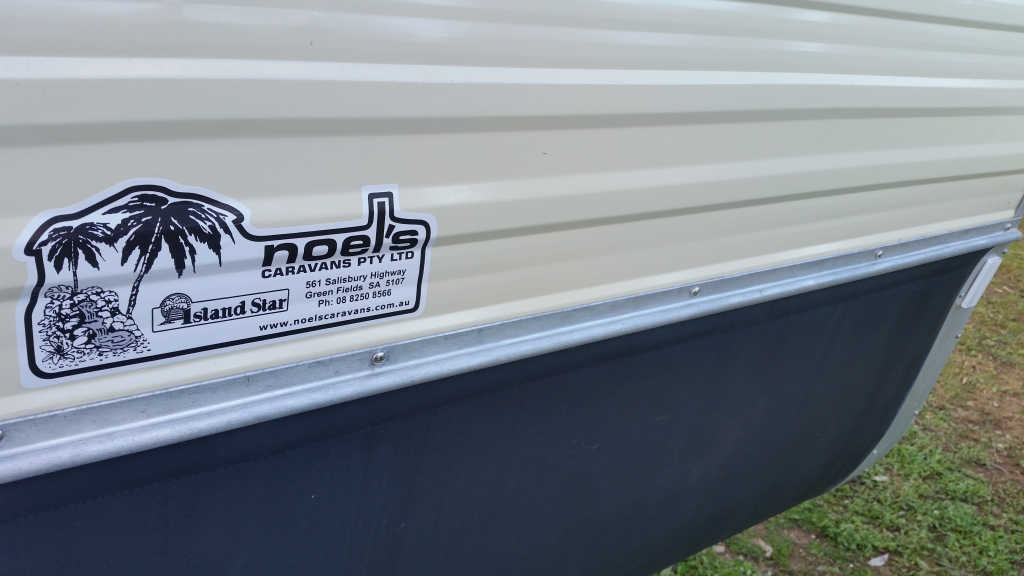
↑original sticker just
inside the door on the wardrobe wall.
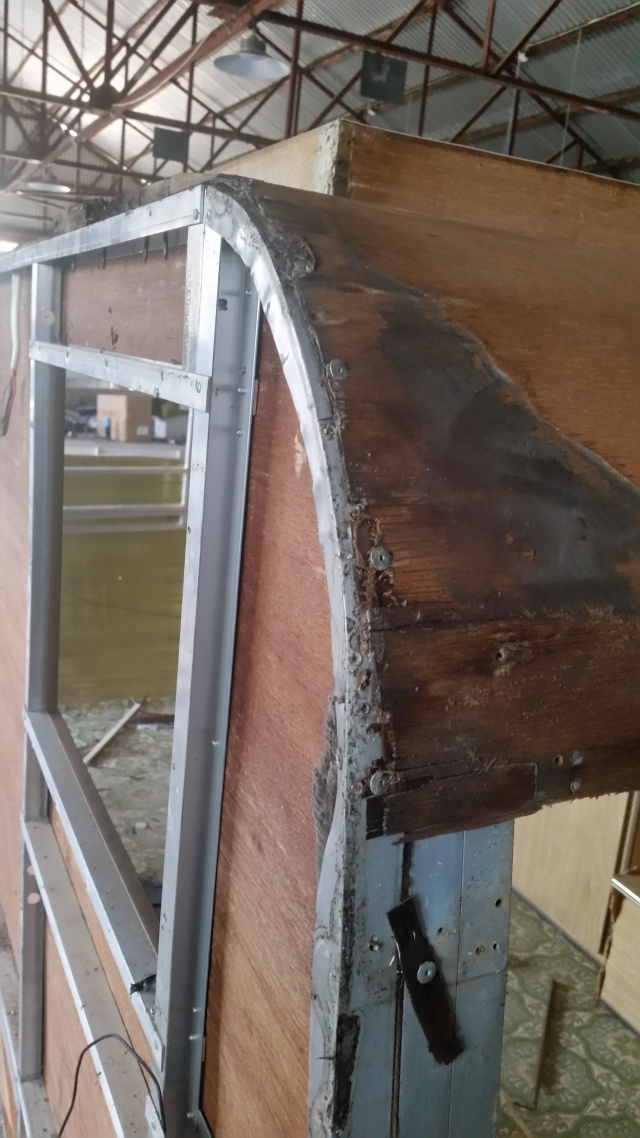
↑ The minor repairs to the
interior started to uncover things. Once the external cladding was removed
(totally necessary as stage 1, there is no other way with this sort of
construction) things started to get more serious.
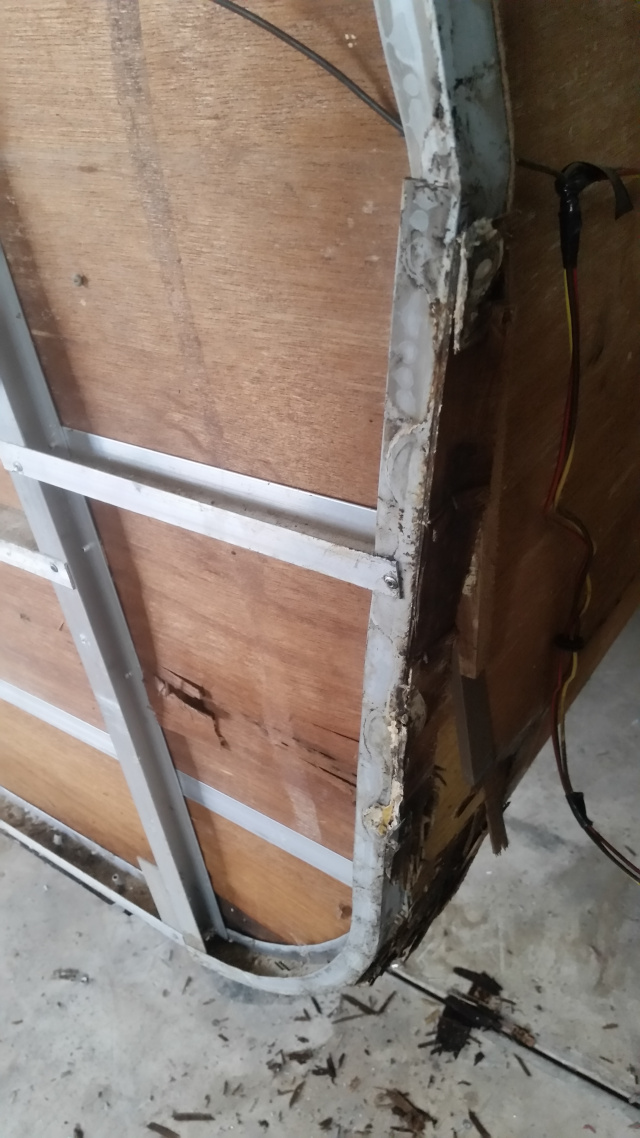
↑ Basically things were
fairly good, but the edges of the plywood sections were suffering. Aluminium
frame was perfect. So, it was obvious the only way to deal with this was to
totally dismantle the van.


↑...so that's what
happened. All rivets drilled out, and the caravan sections dismantled.
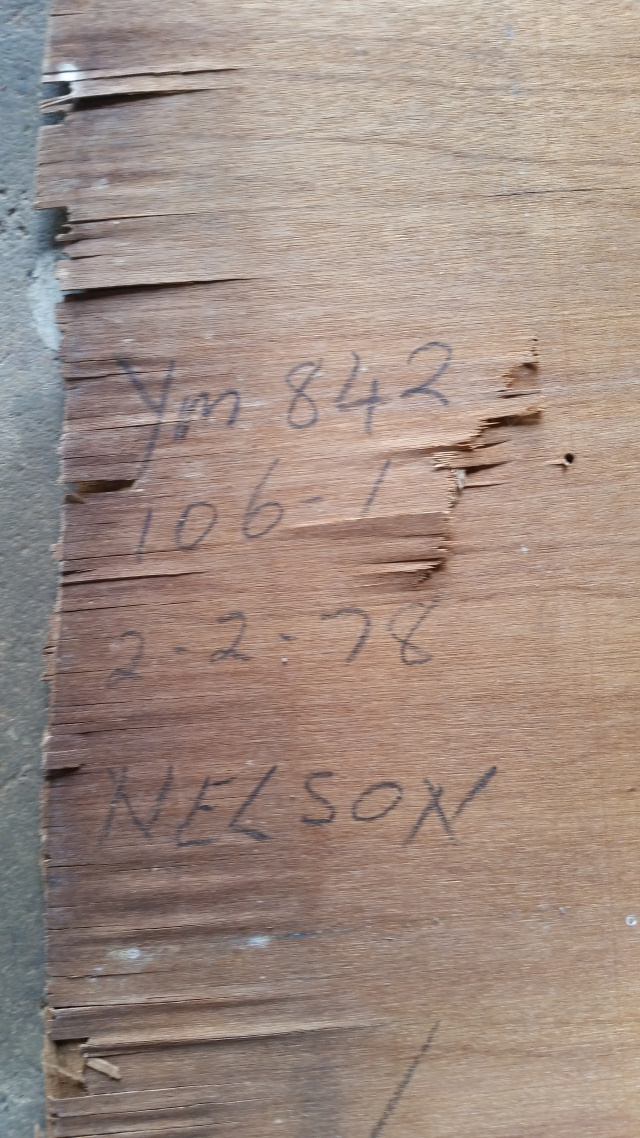
↑ No doubts about
the build date! This was on the back of the original plywood wall just in
front of the entrance door.
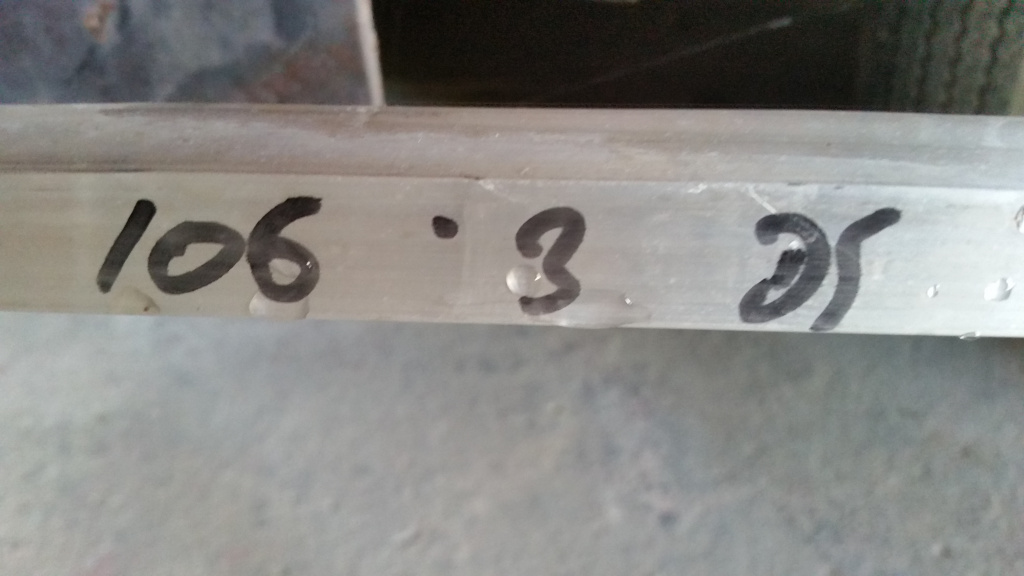


↑ These photos
show how the aluminium frames were pre-fabricated in the factory to suit
various floor plans, and given the approriate codes.

↑ After much
research, I decided to get rid of all wood-based components, which included
the 3mm plywood walls. My decision was to use largely untried PVC foam
panels, which have been used for some time in the signwriting and display
industries, but almost no use in this manner. Cost was comparable, weight
comparable, mechanical strength very close, environmental aspects better,
and definitely vastly better with moisture and related issues.
So, the purchase was made, from Panels World in Ravenhall, Melbourne, and the experiment begins! Above are some of the interior panels pre-cut from the 3mm PVC foam board after carefully tracing the designs from the 3mm plywood originals.
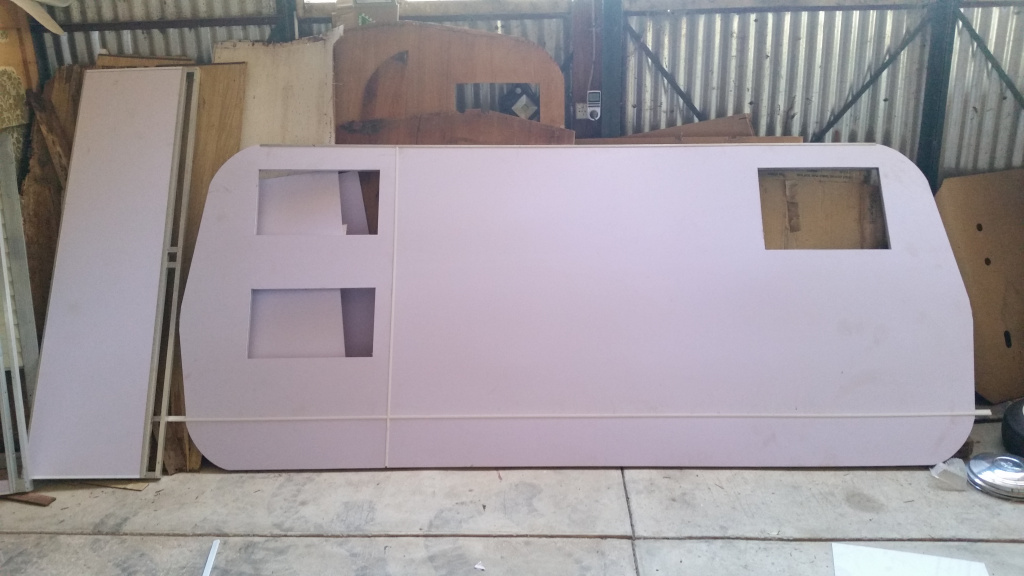

↑ The 3mm PVC foam lining boards have been bonded to the frames, after cutting
the sections using the original plywood as patterns. I was going to also
rivet them, using large headed rivets in the original locations, but am
presently thinking the bonding will suffice. Once fitted to the frames, the
3mm board is surprisingly 'firm', and the frame is much more rigid to
handle. I think it'll work well!
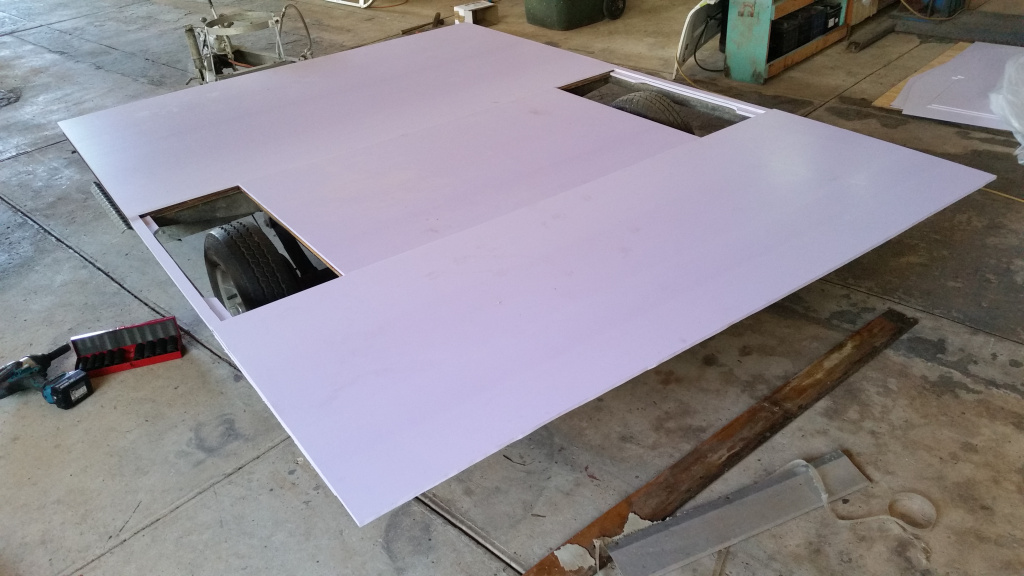
↑ The 10mm PVC foam
board in place on the floor. As this caravan will occasionally carry a few
heavy classic car parts, I was originally going to add some additional
struts to the underfloor chassis, but decided in the end to trim the
original plywood floor to chassis size and retain it underneath the PVC
floor. Going to 15mm PVC flooring would have been about as rigid as the original
10mm ply.

↑ To ensure total
waterproofness of the caravan, I scoured the materials left over from a
recent major house renovation, and selected this Sika 2-part epoxy product
(anything would have done), mixed it up, and applied it to all the joins,
and filled all the gaps around the original wheel arches which had been a
source of moisture and rubbish ingress in the past.
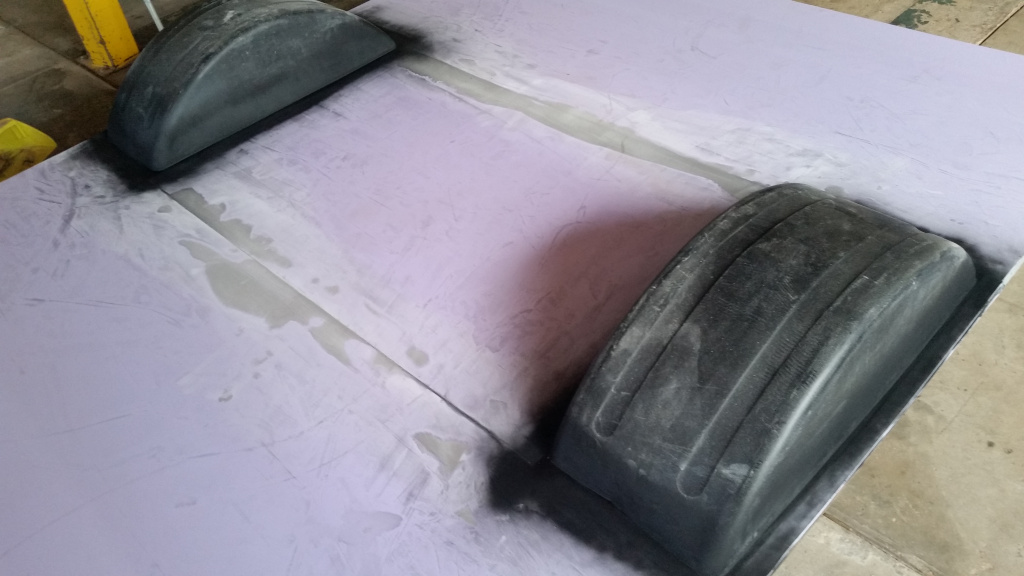
↑ After a sanding with
the belt sander to level everything off, a bit of matte black acrylic paint
was sprayed around the wheel arches. No real reason, as these will never be
visible, but that's what I do.
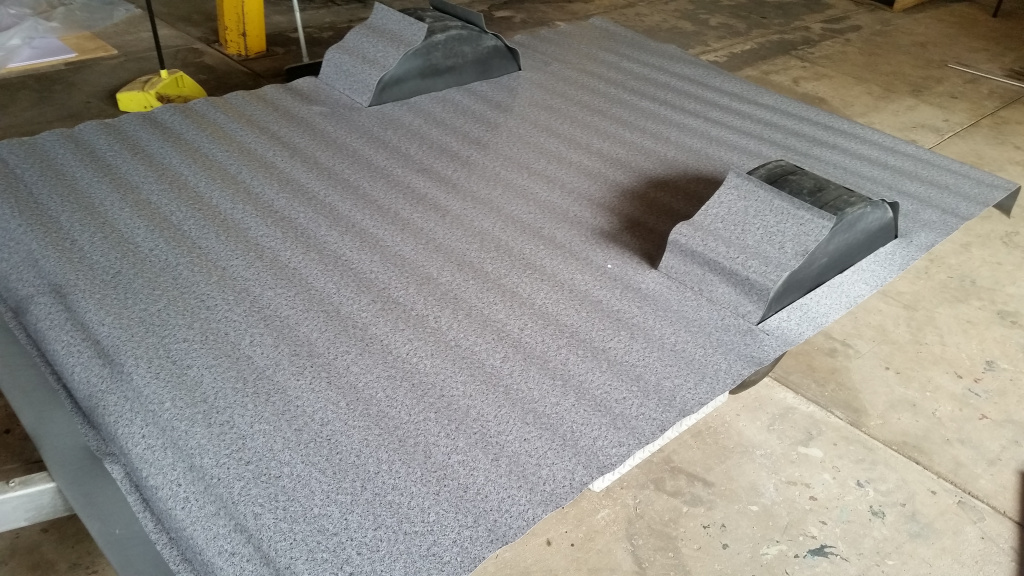
↑ 2 metre wide vinyl
floor covering was carefully measured (twice), and cut (once) and laid out
over the floor, and, as it was relatively cool and the vinyl was still
retaining its rolled-up shape, I worked on the
Cranvel digger for most of the day until
things warmed up, and the vinyl became more cooperative!

↑ Then I returned to the Micro, and carefully glued the vinyl to the PVC flooring.

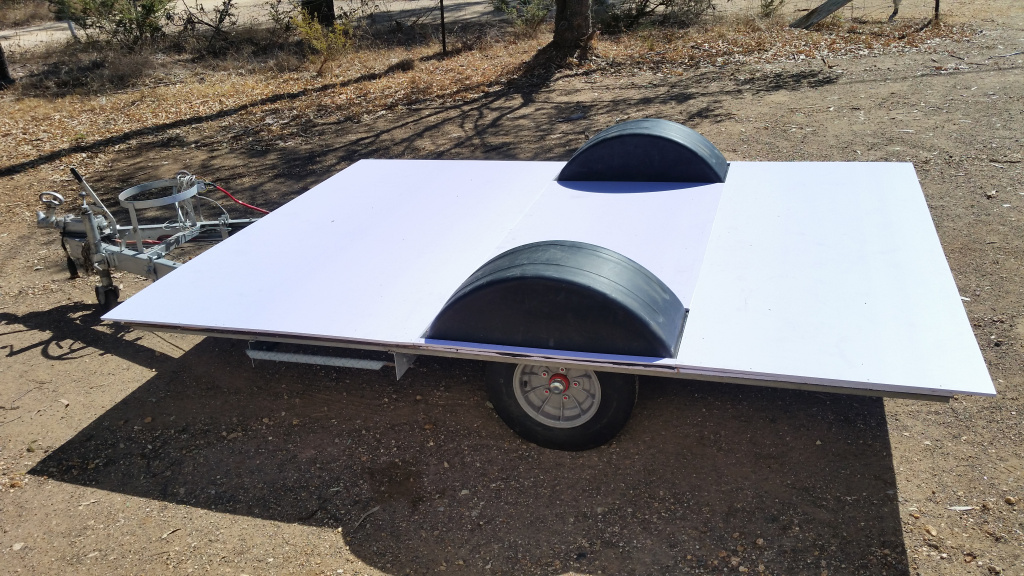
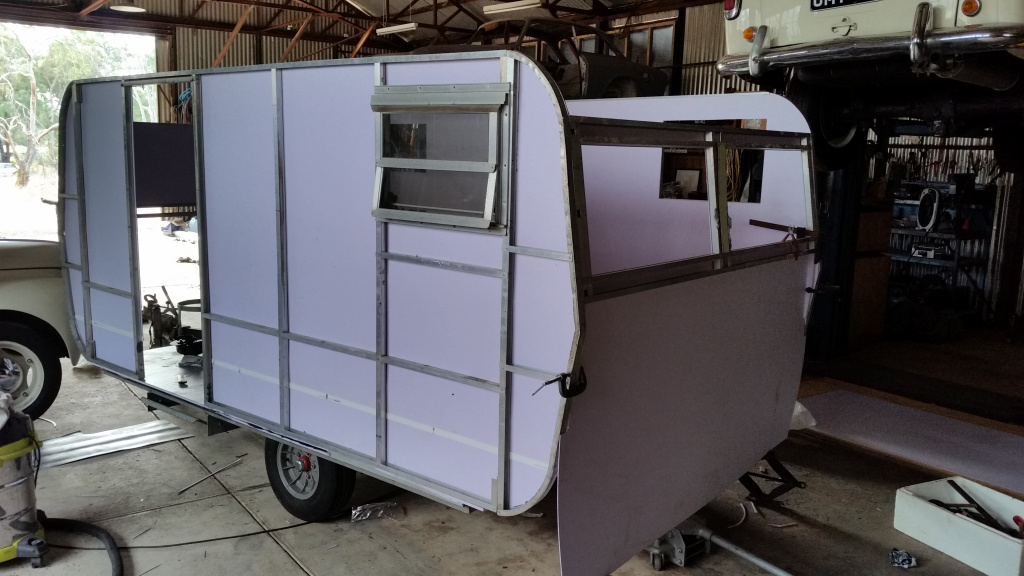
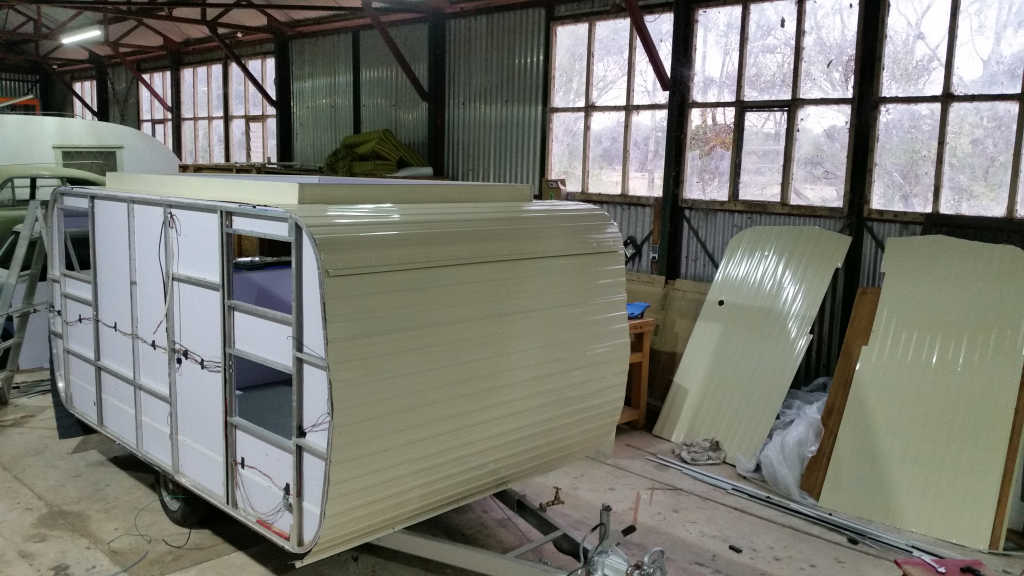
↑ Now it was time to
attach the prefabricated wall panels to the floor. First the right hand wall
and the rear window panel...

↑...then the front
panel...
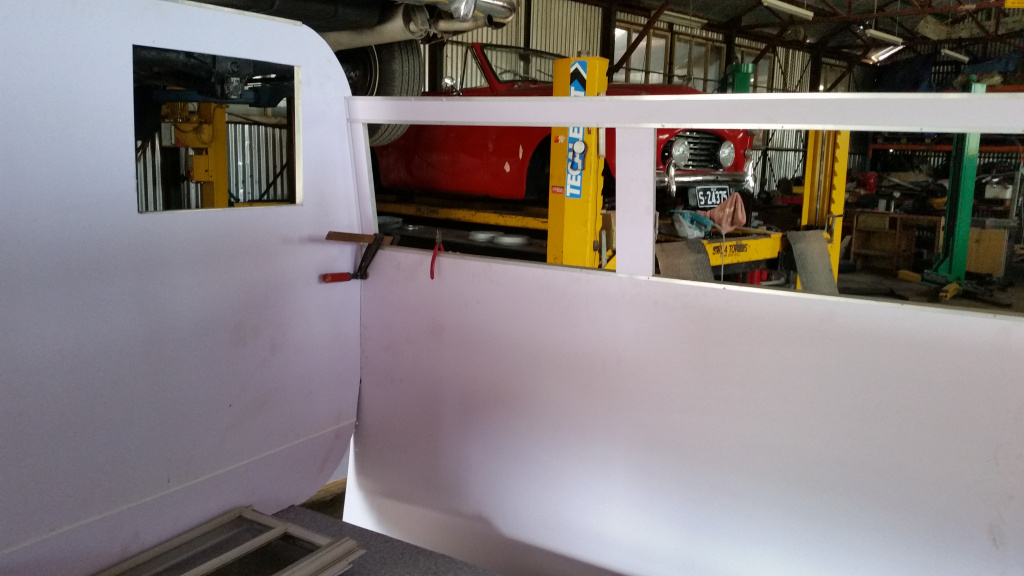
↑...and then the
really complex lower end panels that start off being inside the side walls
beneath the rear window framework,...
↑...but then become
outside the frame at crucial point. You can just see the PVC 'wedges' being
held in place by clamps while the PVC glue sets. These were cut on a
bandsaw, carefully copying the timber originals. Once this sets, I'll curve
the panel over the frame and bond it to the underside of the PVC floor
panel, just as the original 3mm plywood panel was stapled to the original
10mm plywood floor. The window was temporarily riveted into place just to
ensure everything was kept as square as original. I am re-using all the
original rivet holes to ensure everything lines up to exactly as it was
assembled in the factory 45 years ago.
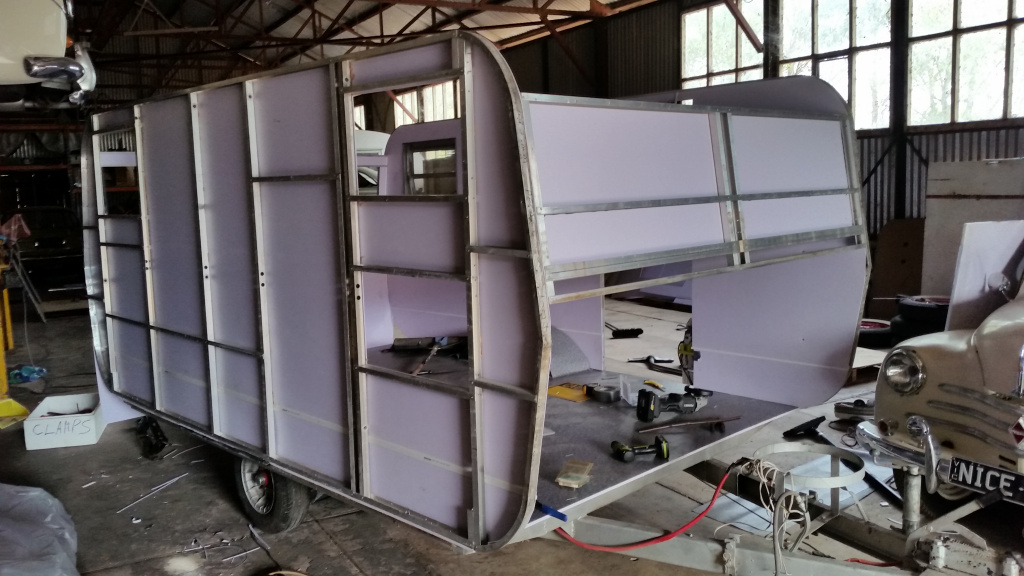
↑The view from the
front at this stage.
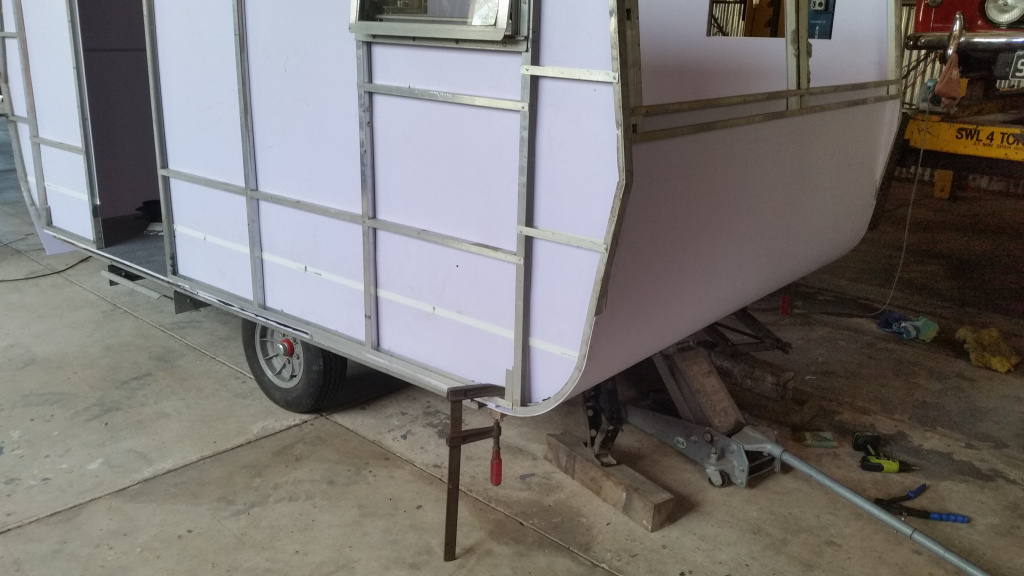
↑ Finally I get to
test the bendability of the PVC panelling, and its stiffness when curved (as
it's the only support for the external cladding at this point).
Both aspects look really good! Being PVC, I used clear PVC cement to bond the 3mm skin to the underside edge of the 10mm floor, where the original plywood version had been stapled. The jacks and clamps in this photo are holding a wooden support beam in place while the PVC cement cures.

↑ The front lower
panel is positioned, and the 'wedges' replicated on the workshop bandsaw
from the timber originals are glued and clamped in place (see next photo for
detail).
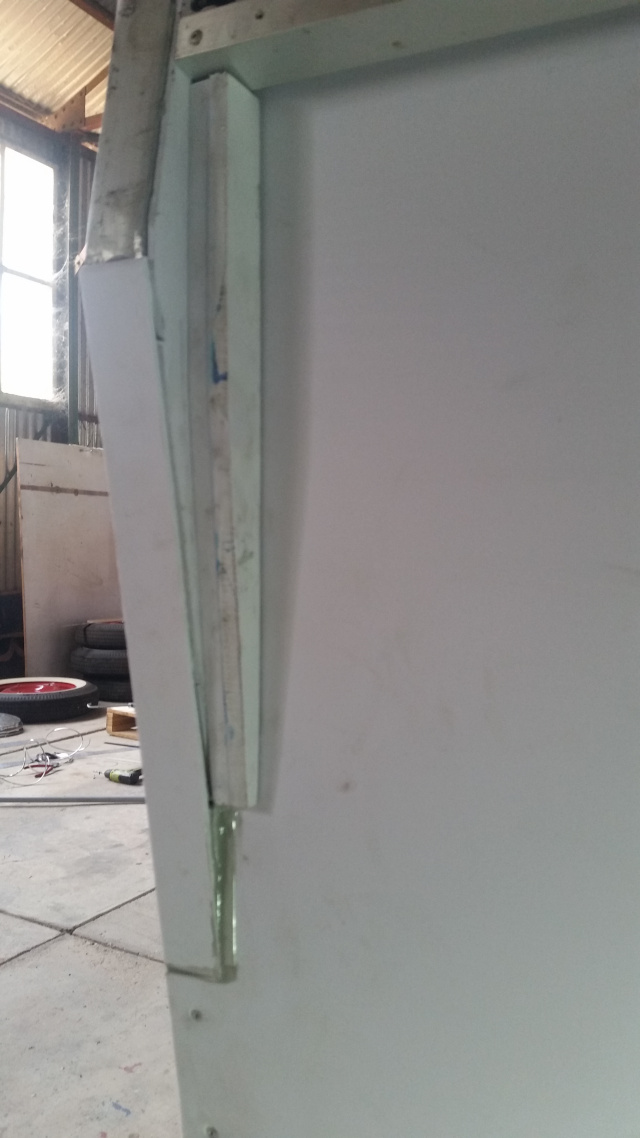
↑ This is how the
'wedges' appear after being cut on a bandsaw (exactly to the shape of the
timber originals) from 10mm PVC board, and glued to form a 20mm wedge.
Neutral cure silicone seals any possible air or water leaks.

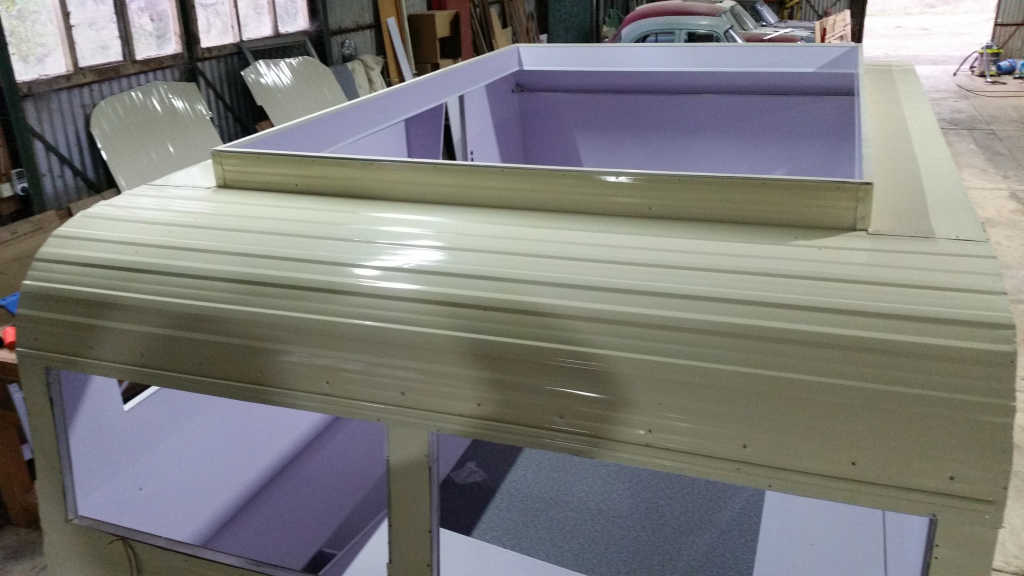
↑ All
relatively straightforward until I came to the structure supporting the
fibreglass poptop roof. The original timber supports were still perfect, and
could have been re-used, but I was on a mission! Dimensions couldn't change
by more than a mm or so, as I will reinstall all the original, aged
cladding, using all the original rivet holes.
I finally
came up with a design that used 15mm x 30mm x 2mm rectangular aluminium
tubing to replicate the original 13mm timber struts, and also used a
'sandwich' of 10mm and 3mm PVC board to exactly match the original 13mm
wooden surround that the canvas attaches to, and the roof seals onto when
dropped.

↑ After a lot
of careful measuring, remeasuring, cutting, clamping, remeasuring and
glueing, the structure is basically in place. Dimensions are mm perfect, so
I know the roof will fit when it's eventually reunited with the van after
the old cladding is refitted. There will be absolutely no timber to rot in
this thing!


↑ I'd
been thinking a lot (generally when I should have been sleeping!) about how
to treat the interior. This had to be decided on before the outer cladding
went on, or even before I decided on the where and how of the LED 12V strip
lighting I'll install. This van is being built for a specific purpose,
primarily to tow behind my beavertail truck any time my we venture to
distant places to pick up any new vehicles or parts. It also will be used
occasionally behind a classic car attending an event that we'd prefer to
stay overnight at, so it had to be light, had to be guaranteed never to rot
(no timber at all - the galvanised chassis and aluminium frame are still
perfect after 45 years, and were the reason I chose this van), and had to
probably carry awkward objects, or parts. No kitchen needed, no overhead
cabinets, no wardrobes, no 240V power, no built-in fridge (we can simply
pack our trusty portable 12/24/240V fridge/freezer), no stove or oven (if we
really want to cook, we have ample portable camping equipment that can be
brought along), and no permanent upholstery or bedding (we have a great
inflatable camping mattress we can throw on the floor), probably no
underfloor water tank (still an option to refit, but we'd just carry
containers of water when needed). The sleepless nights came from trying to
work out the plan that left as much of the floor vacant (big enough for a
standard double camping mattress to fit), but gave as much storage as
possible for various things (but low down - I really wanted to avoid
overhead cupboards and anything else that unnecessarily jutted out into the
limited usable space). The problem, though, was that the original cupboards
were structural, giving support to the poptop side supports.
So the structural solution in the end was the slender, angled 'brackets' I made from 10mm PVC foam board, which feed the roof loads into the wall frame, just as the cabinets had, but much more rigidly. It took a lot of working out, and a few dry runs, to get these firmly installed using both PVC welding cement and stainless steel screws driven in from the exterior so they are invisible. It worked a treat!

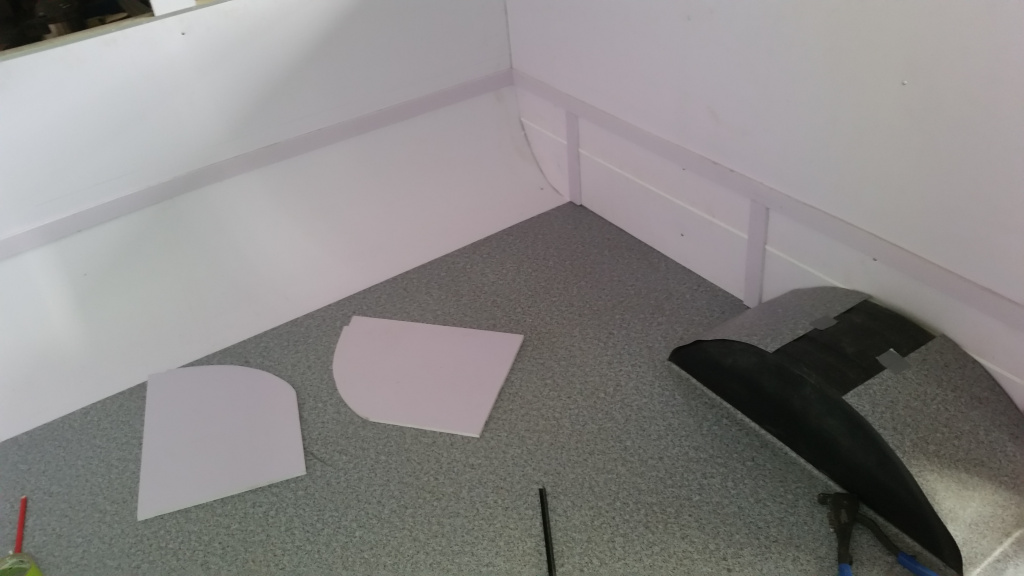
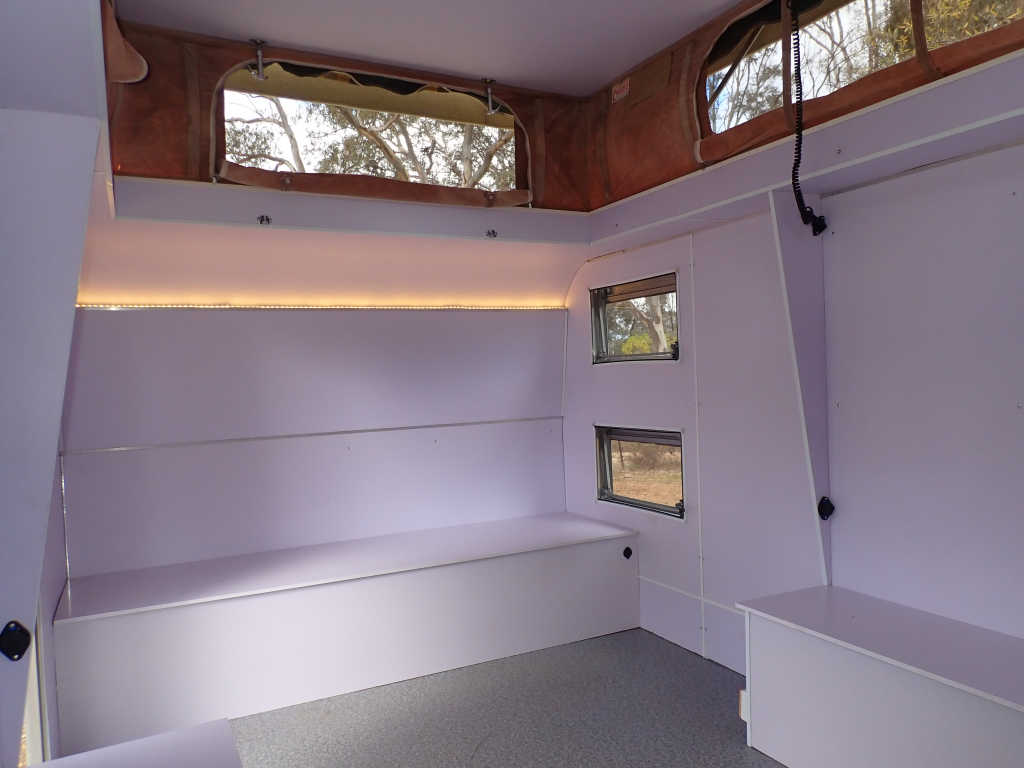
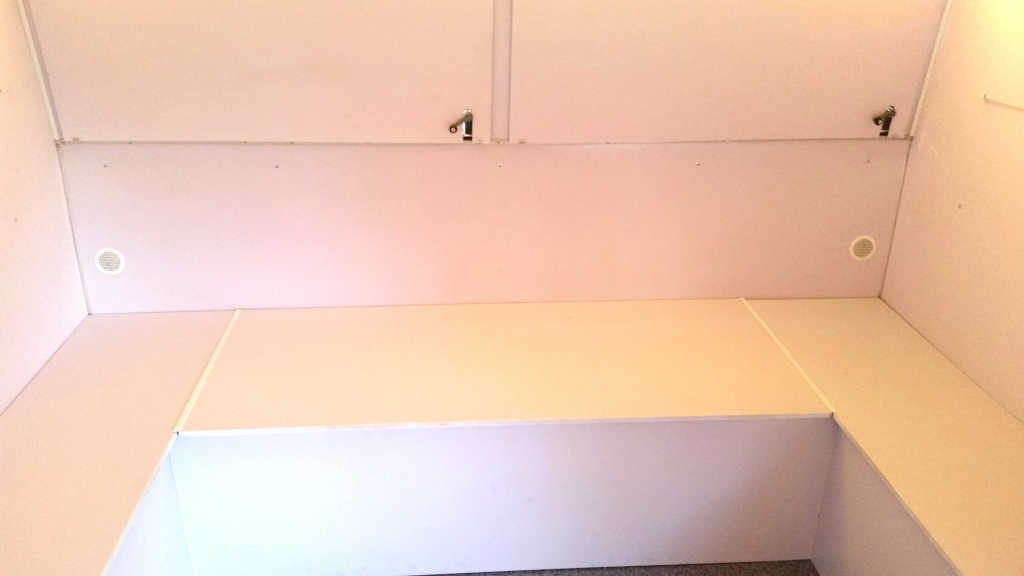
↑ The precut
(from 10mm PVC board) skeleton that will support the front 'bench seat' that
is primarily both structural and offering plenty of storage (the 'lid' will
be removable). A similar design will apply at the rear, but in a 'U' shaped
plan that will incorporate the wheel arches on the sides.
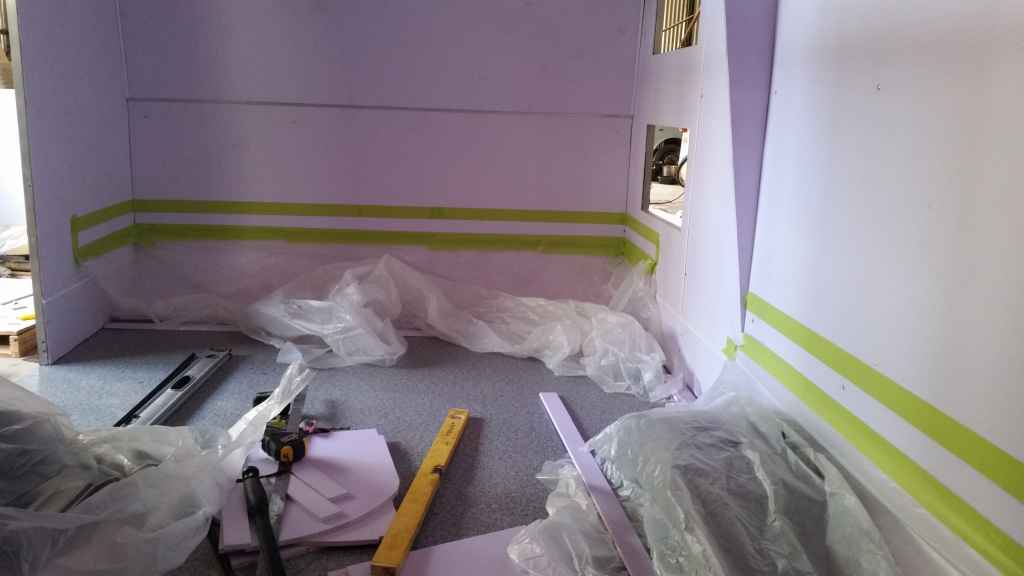
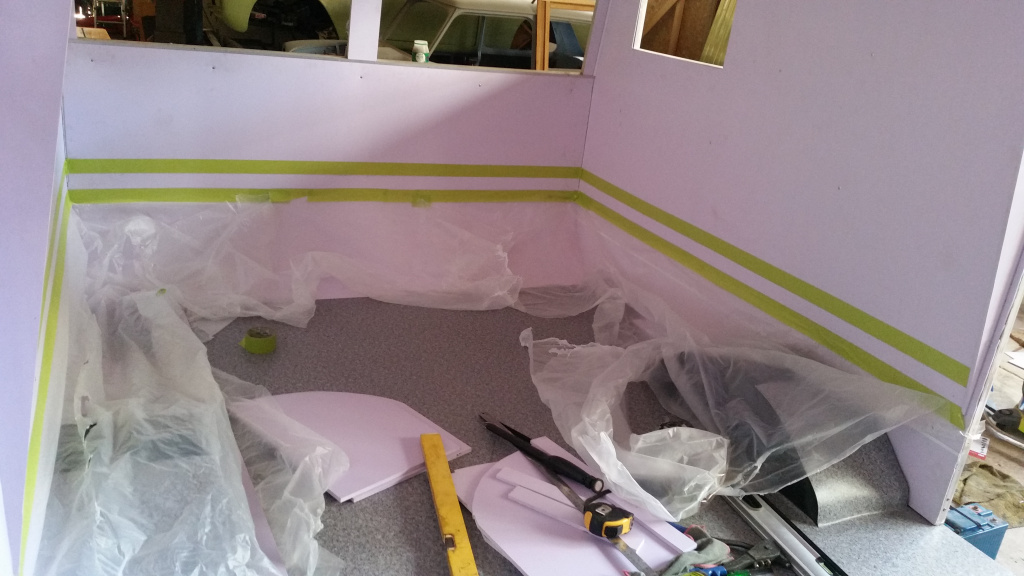
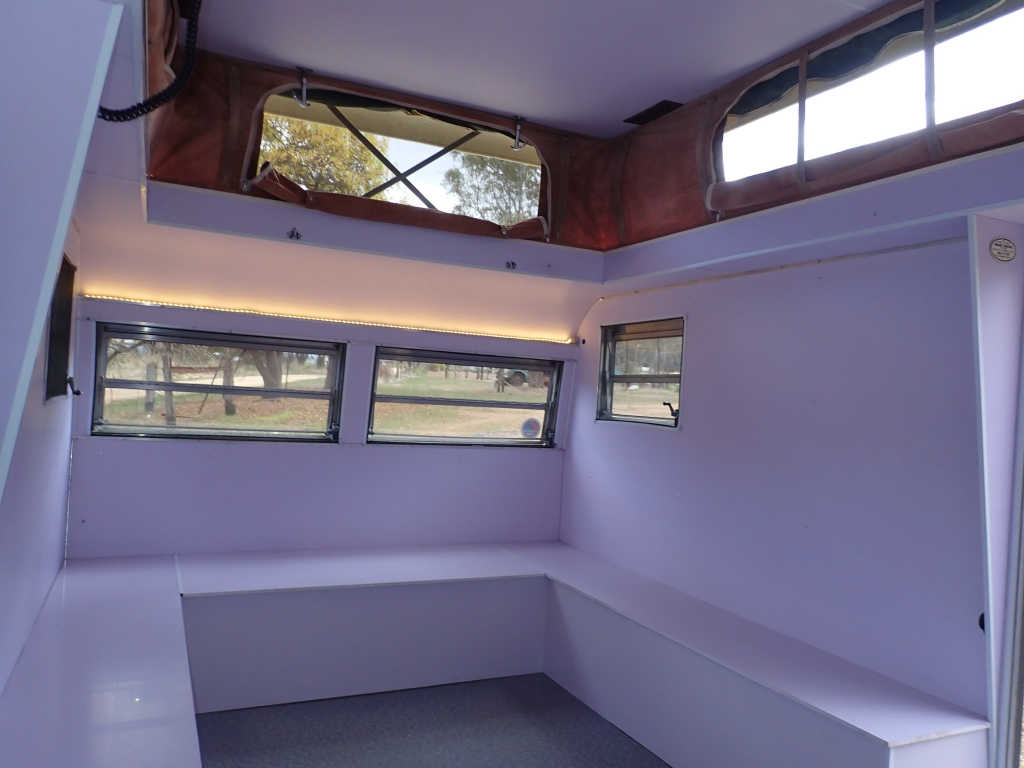
↑ Finally
the time has come to get serious, and start installing the
seating/storage/stiffening units. First stage is to very carefully measure
everything, mark it in pencil (easy to remove), and then mask up so I can
accurately and neatly apply the PVC primer and cement when installing the
wall 'rails' to support the lids/tops/seats, whatever you want to call them.
PVC cement is ruthless in its time demands, giving almost no time to apply
adhesive and fit the item, so careful masking means I can go like a madman.
I hold the rails in place carefully for about 10 minutes before relaxing the
pressure, and will then screw with stainless steel screws from the outside
of the wall panelling for extra support.

↑ Sounds
easy, but doing it solo was an absolute pain! A lot of improvising was
needed to replicate a human 'helper' by positioning various props to hold
things in place on the other side of the wall while the cement set,
effectively 'welding' the PVC together. So far, so good!

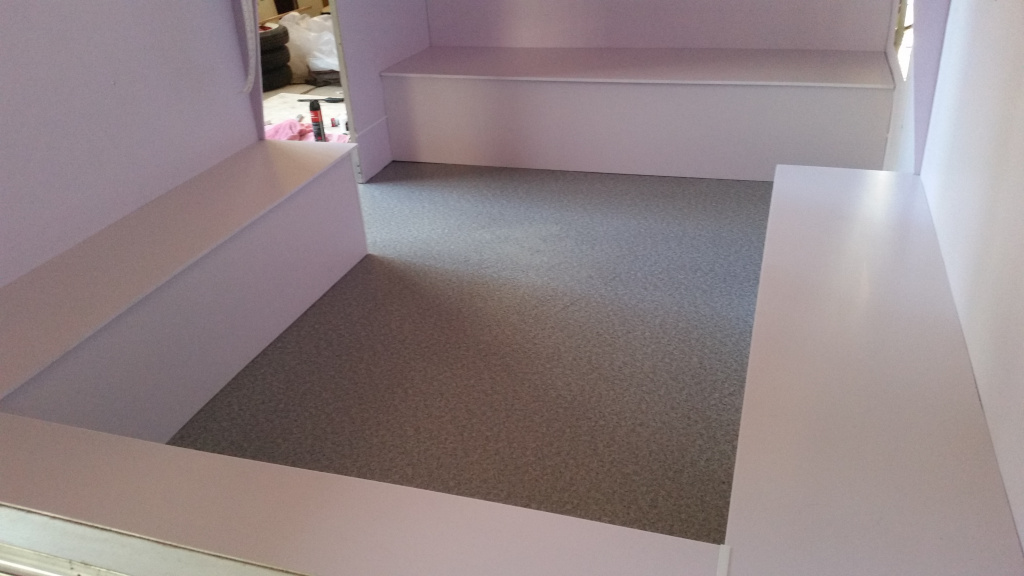
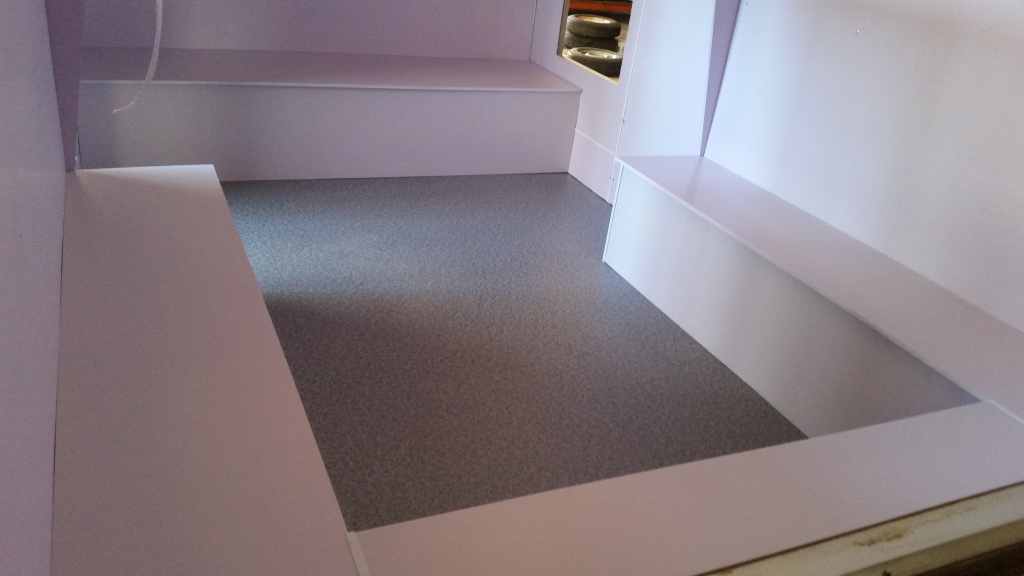
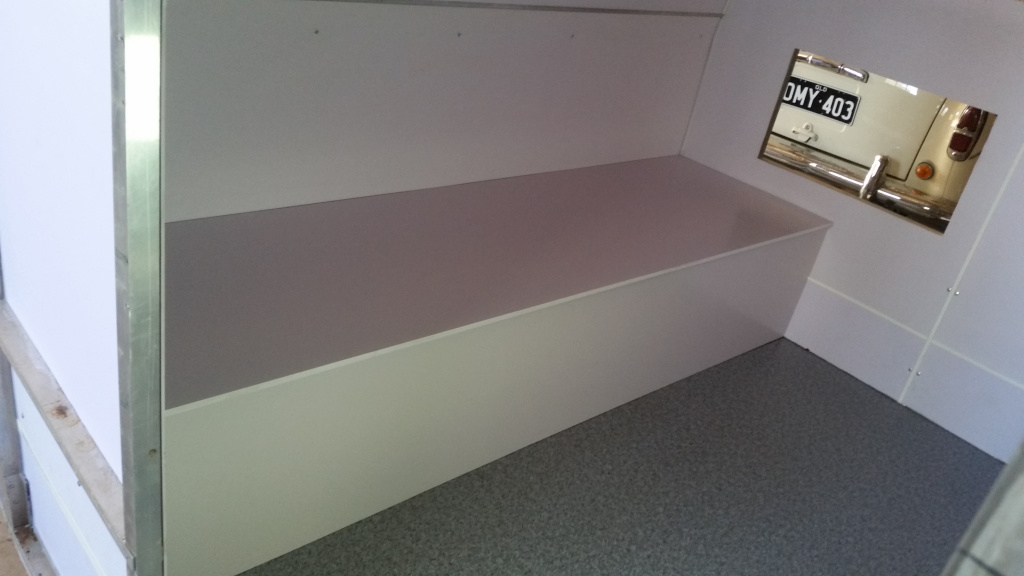
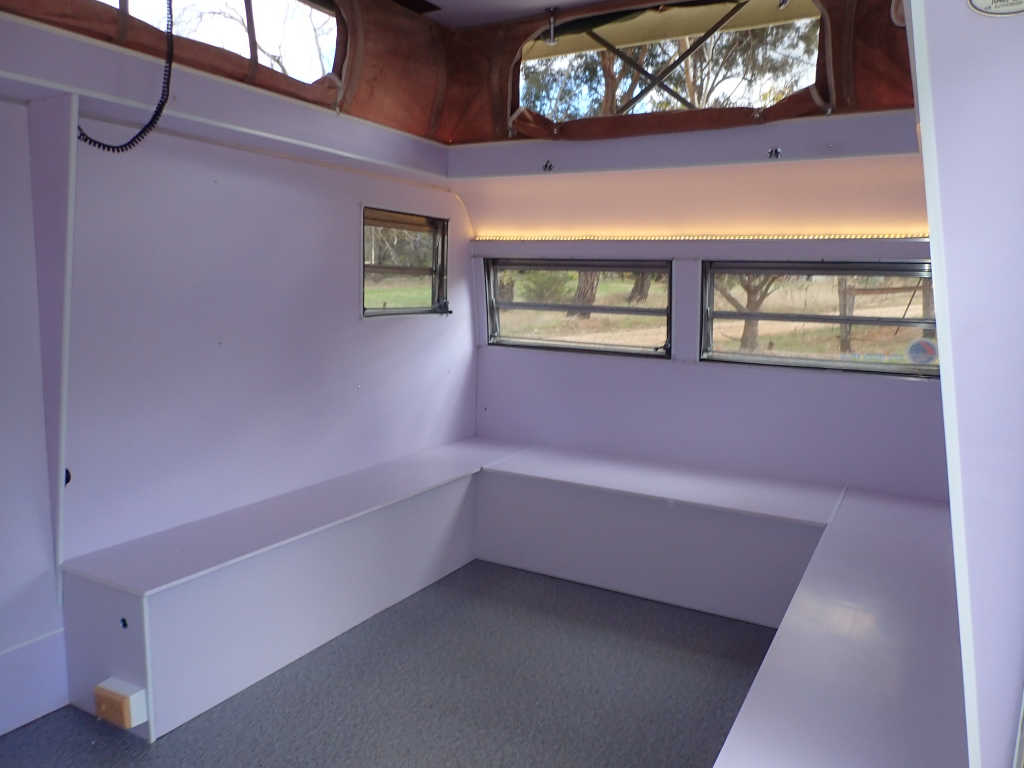
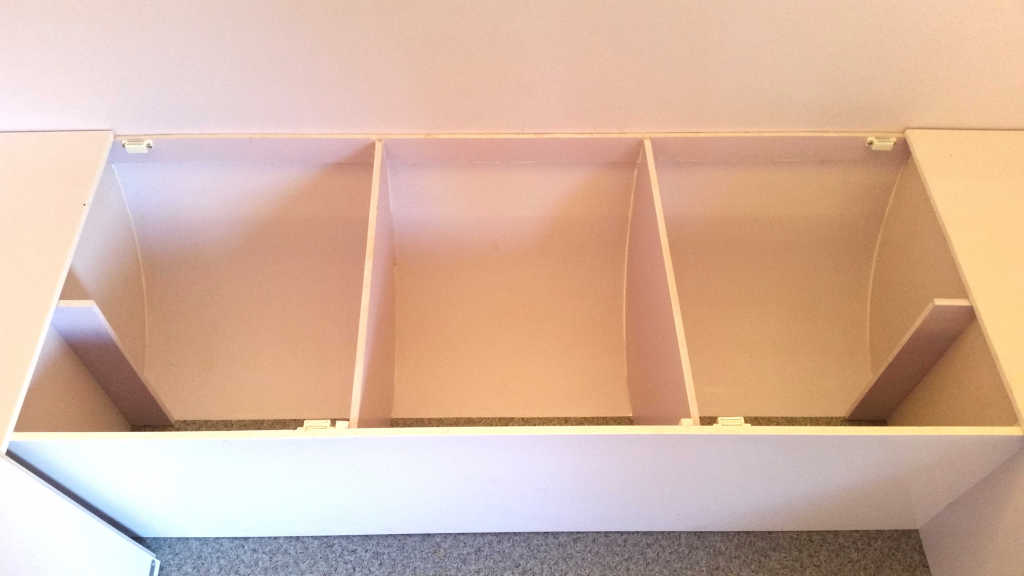
↑ After
buying 3 more sheets of 10mm PVC foam board, and a couple of days carefully
cutting on the Triton saw bench, and lots of careful gluing and screwing,
the perimeter seating/storage units are all in place. As the board is so
light, I decided not to hinge the tops, but make them removable (simply
locking into position with tabs carefully located underneath), as I may
sometimes want the storage units without a top (awkward materials or car
parts I may be picking up), and leaving them behind is a lot better than
lids flapping about on hinges.
↑ I went to a bit
of trouble to save this original sticker on the side of the wardrobe at the
entrance. I coudn't remove the vinyl from the backing without risking
damage, so carefully cut around it with a sharp hobby knife and retained the
top layer of the original plywood...

↑ ...and put it
in the same location on the structural strut that was put in place to take
the roof loads the wardrobe previously took.
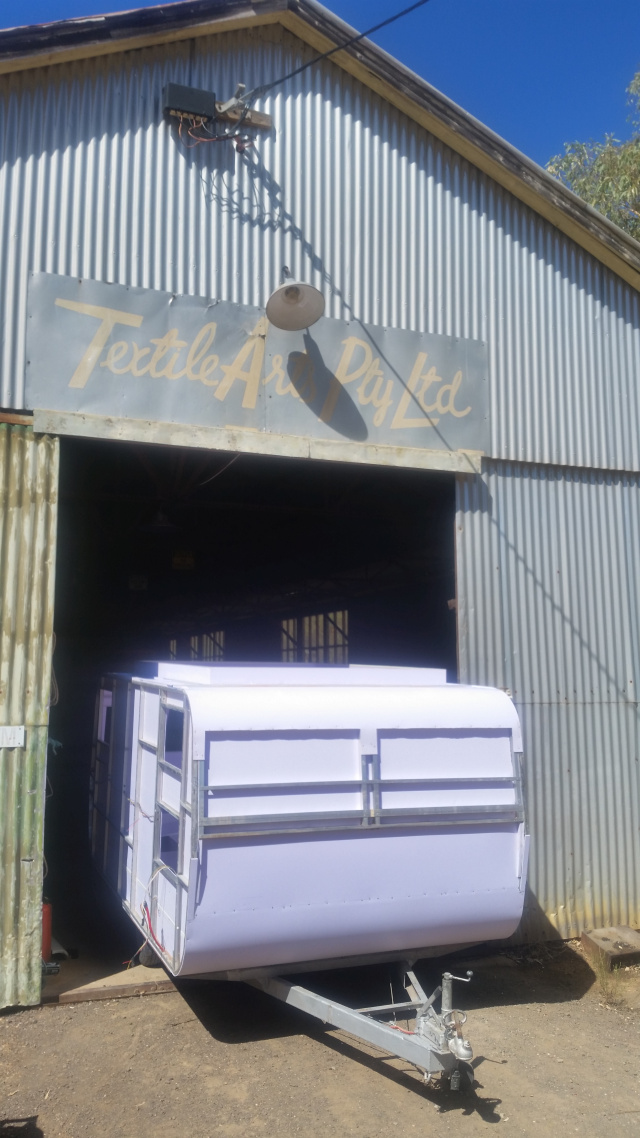


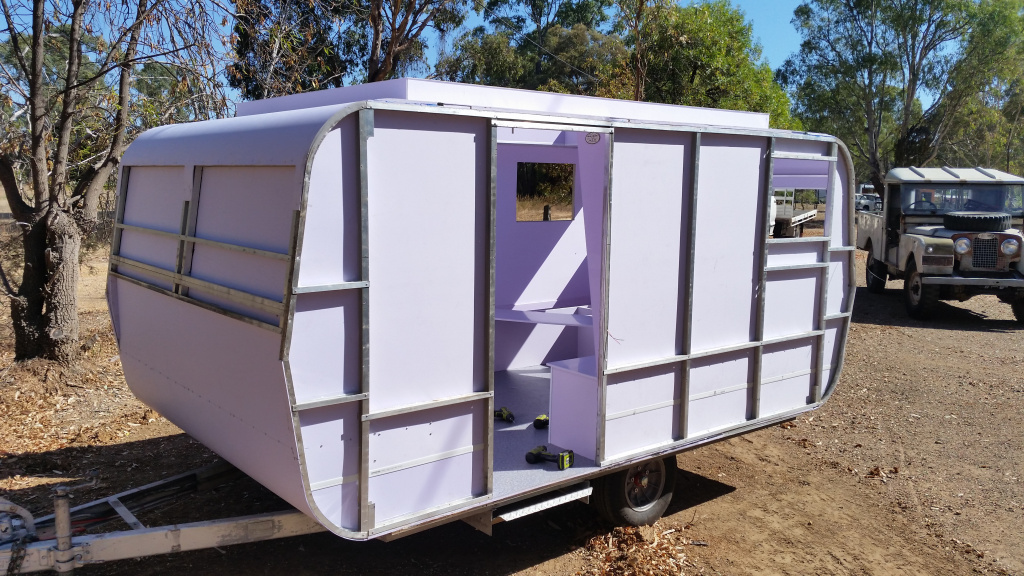

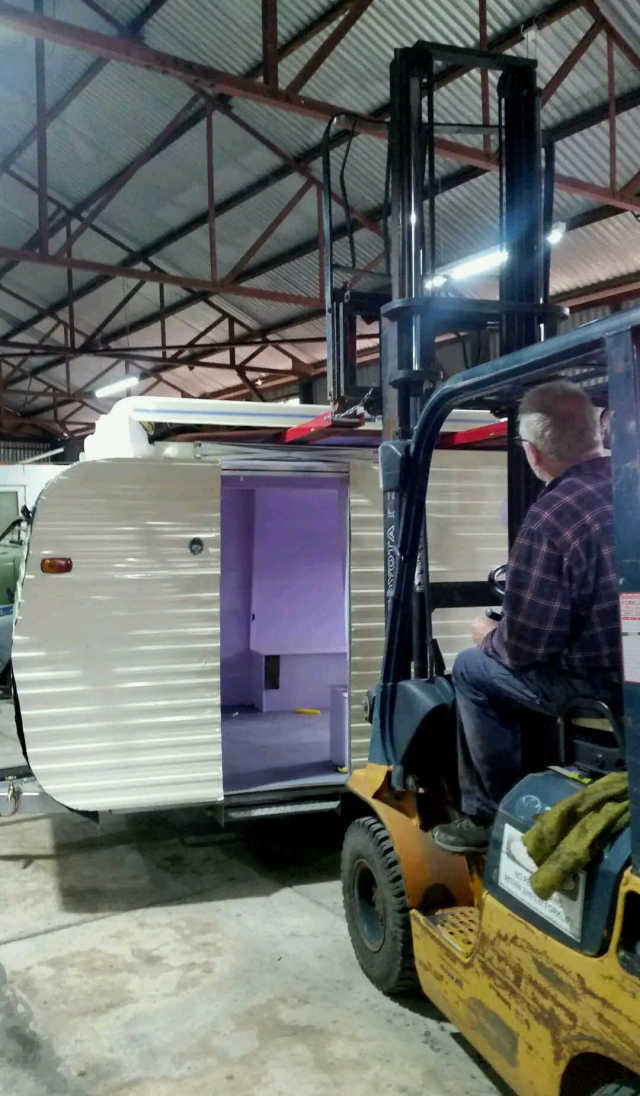
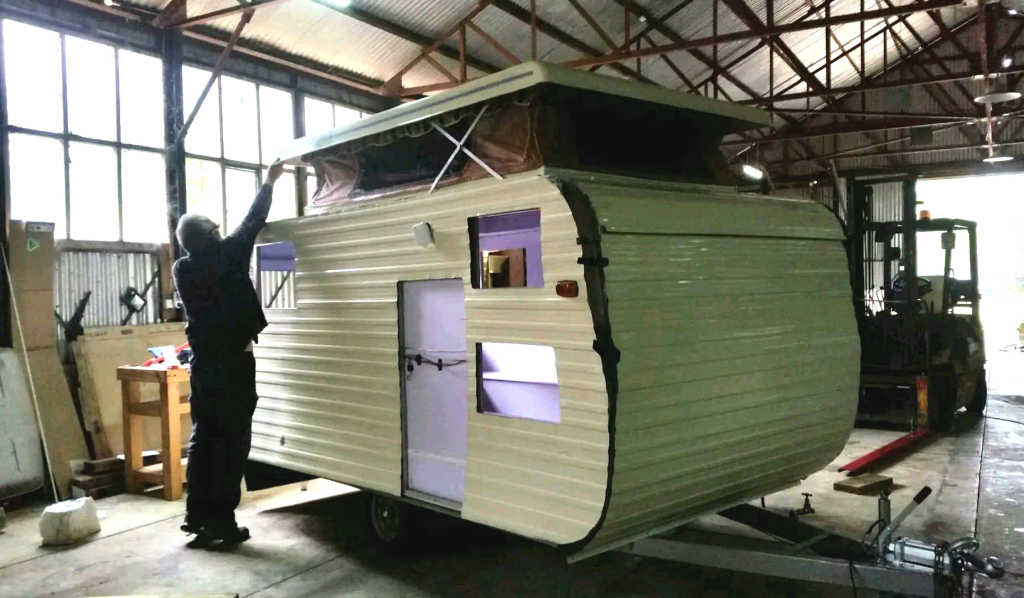
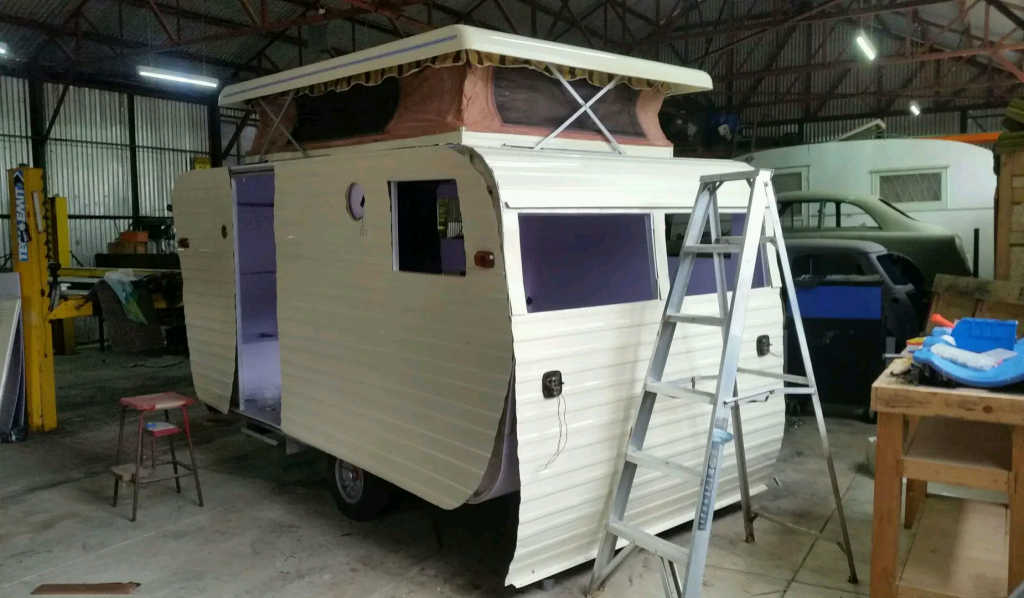
↑ While I
retrieved the fibreglass poptop from the workshop rafters, using a forklift,
I was careful to remove anything that might get damaged if things went
curly! So the caravan was pushed outside into daylight for the first time in
a long time, giving the chance for some well-lit photos.
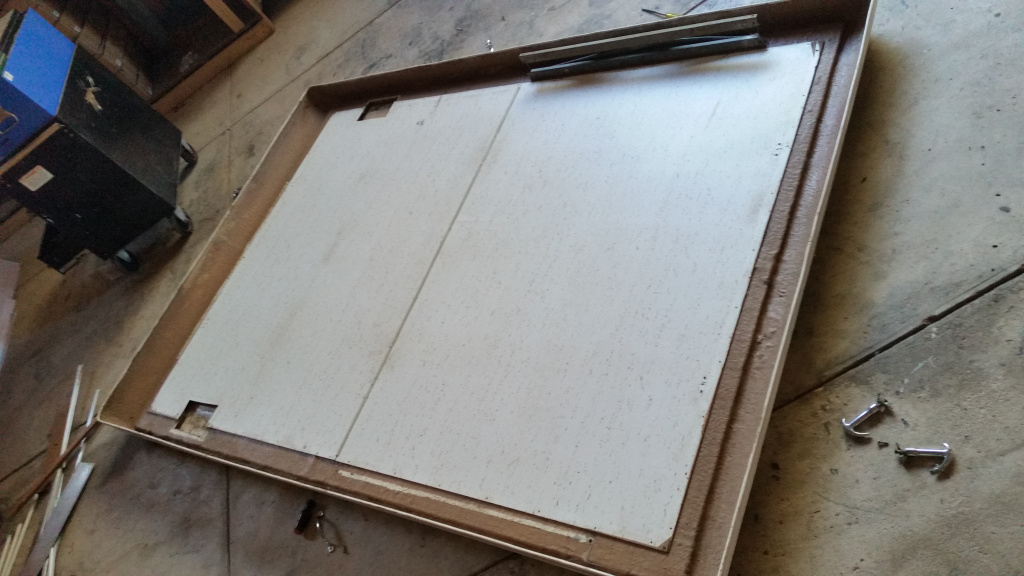
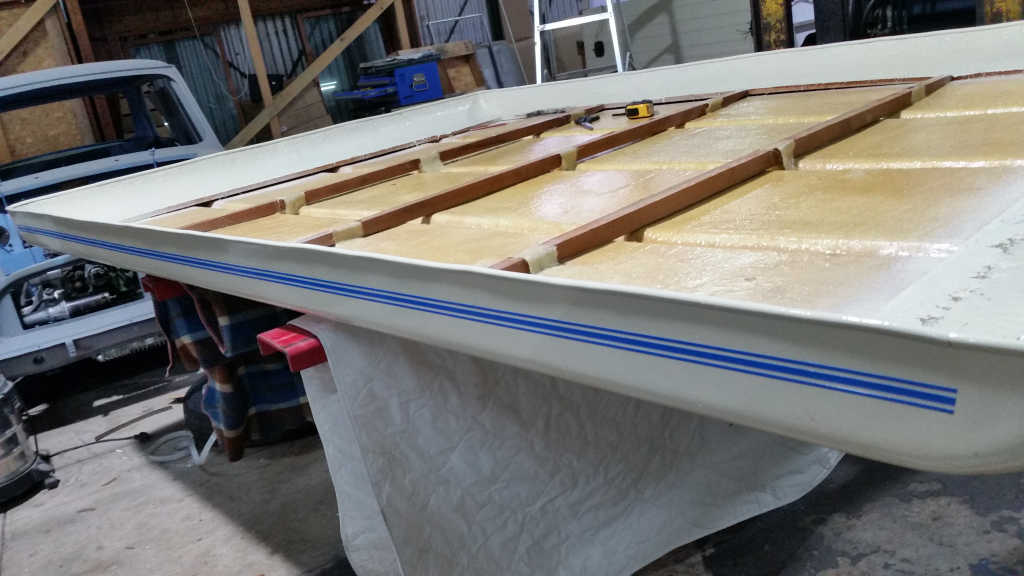
↑ Once back
safely to the floor, the poptop was turned upside down to remove the
original plywood ceiling. This was still in pretty good condition, but I was
resolute in my plan to delete all plywood!
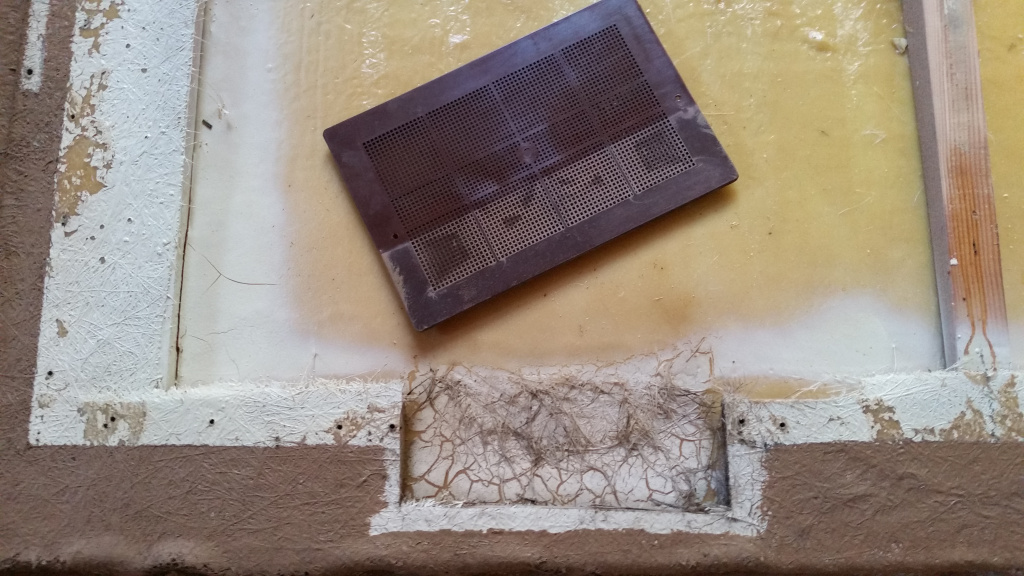
↑ Worth showing
the original vents that are crucial in preventing rotting of the integral
structural timbers of the poptop, and the plywood ceiling. After cleaning
up, these will definitely be reinstated. So many 'restorers' don't
understand the importance of ventilation to deal with inevitable
condensation.
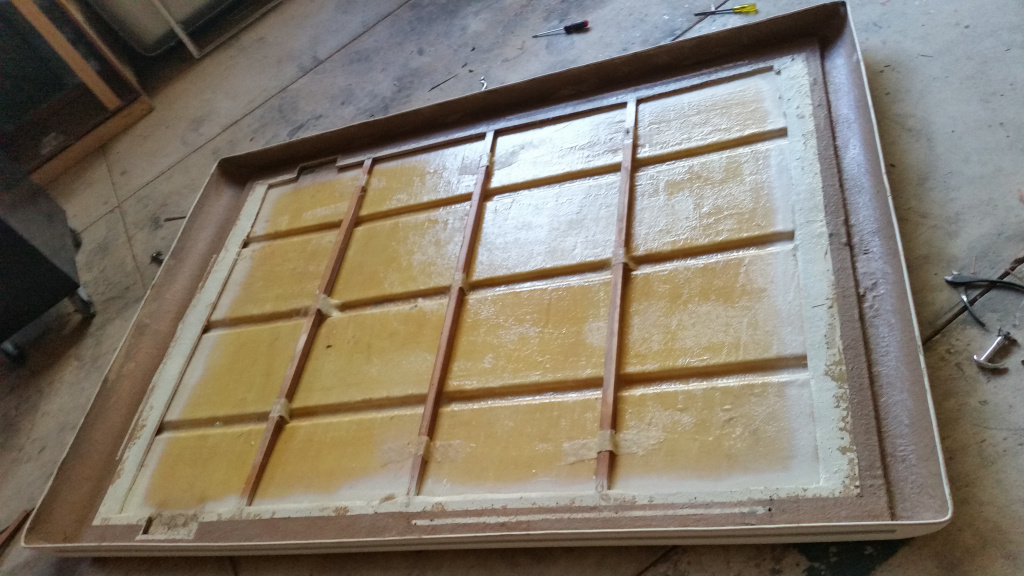
↑ The upturned
fibreglass poptop with the ceiling removed. All in perfect condition, thanks
to the vents (above). After a small solar panel is installed, the necessary
wiring will be fitted before a new 3mm PVC foam board ceiling is fitted,
using the carefully-removed plywood originals as patterns.
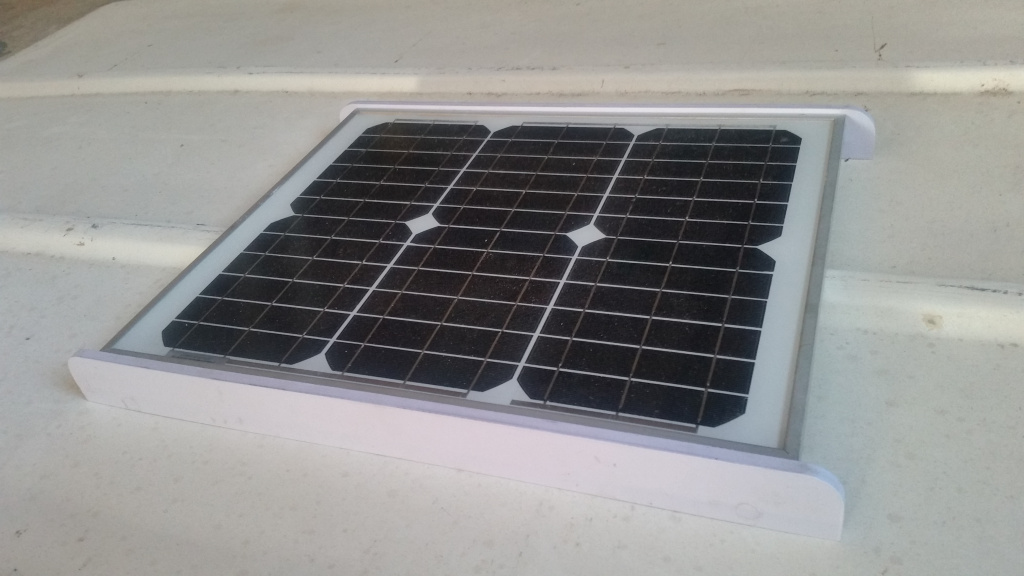
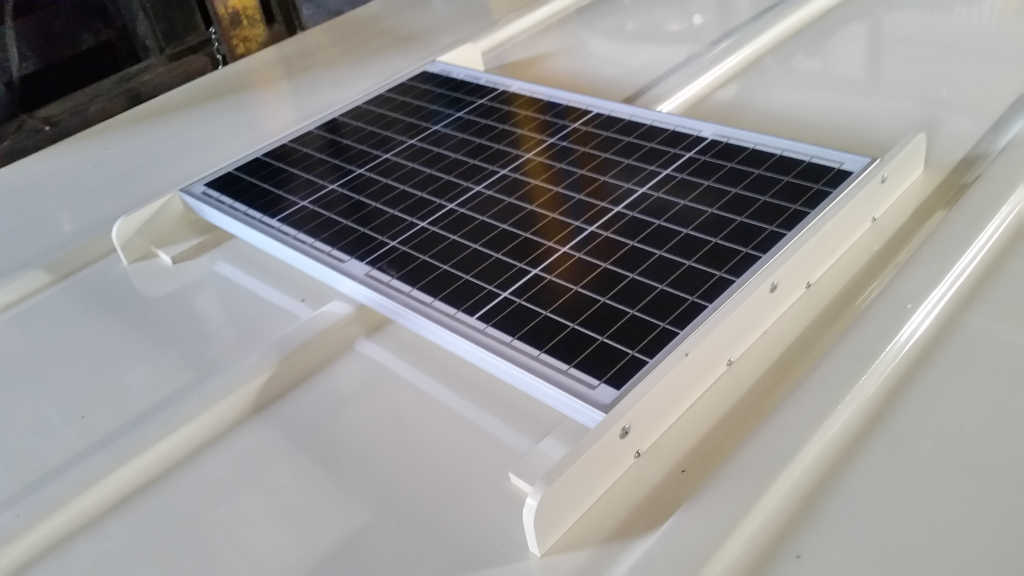
↑ Trial
fitting the 30W solar panel, using custom-made mounting (using offcuts of
the 10mm PVC foam board) that replicates the roof profile while allowing
adequate ventilation under the panel. A modest 15AH Lithium battery will
supply the modest power needs for the LED lighting and small water pump.
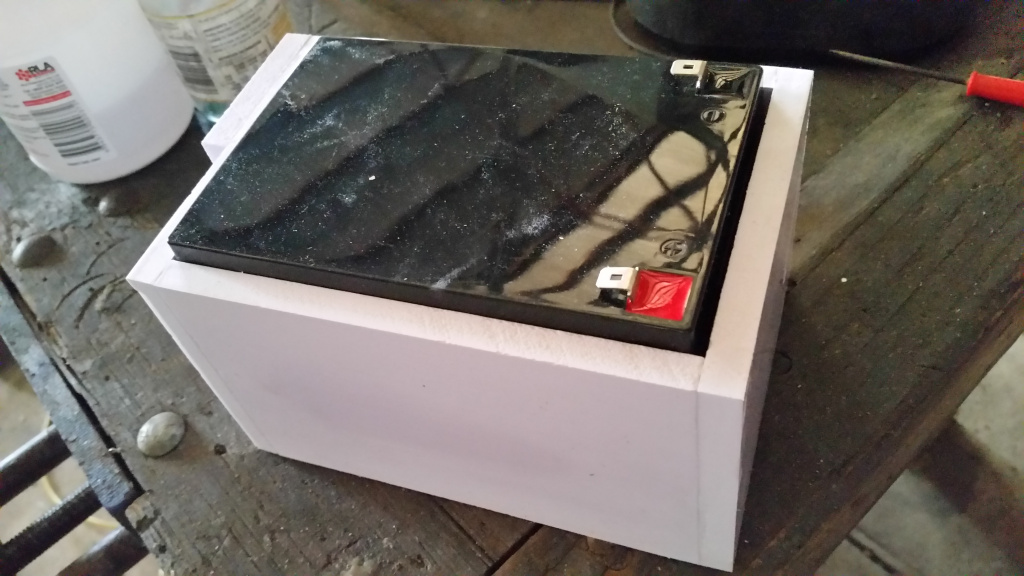
↑ I made up a
battery box from 10mm PVC foam board offcuts to tightly hold the LiFePO4
battery, using the dimensions given by the supplier. Luckily, they were
accurate, and it fitted like a glove.
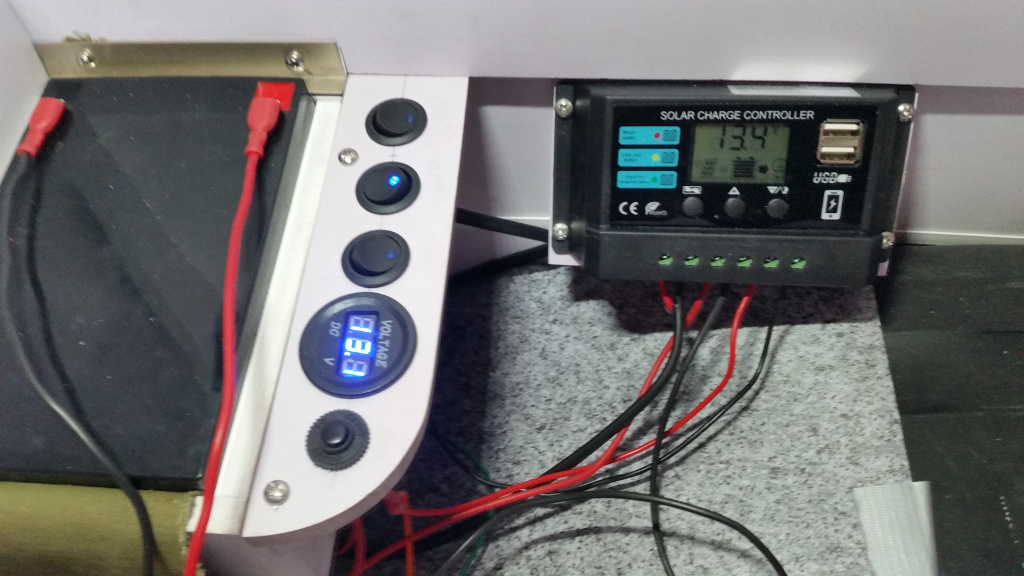
↑ Here is the
battery and 10A solar controller, installed for testing. Wiring will be
tidied up, now that tests on a nice sunny day show it works perfectly!
Switch panel (far to near) is 1) on/off for external Anderson connector for
external, portable solar panel or 12V accessory we wish to power from
outside (fridge, lighting, whatever), 2) master on/off, 3) water pump (see
below), then a voltage indicator and a 10A circuit breaker.
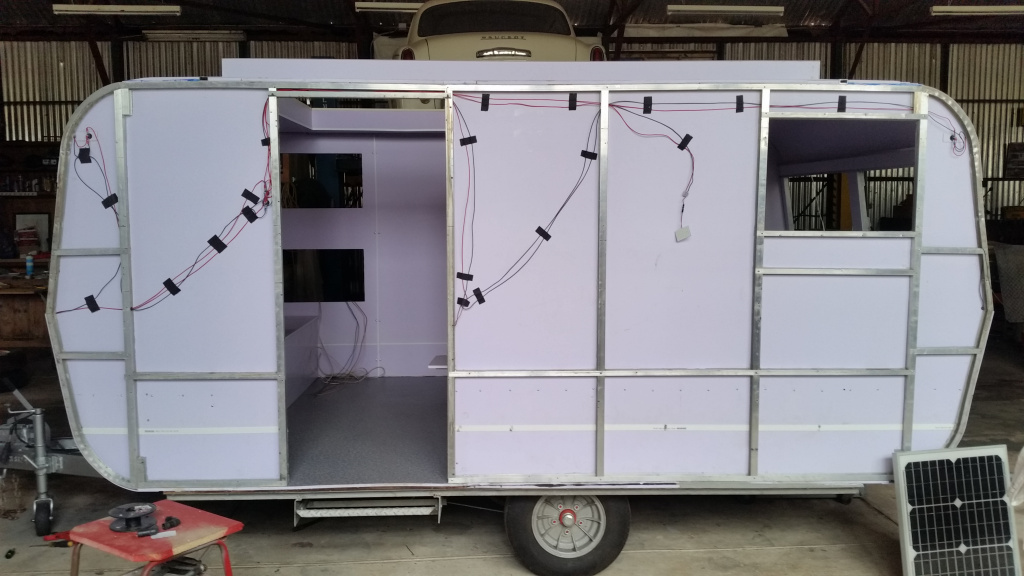
↑ Lighting wiring
installed.
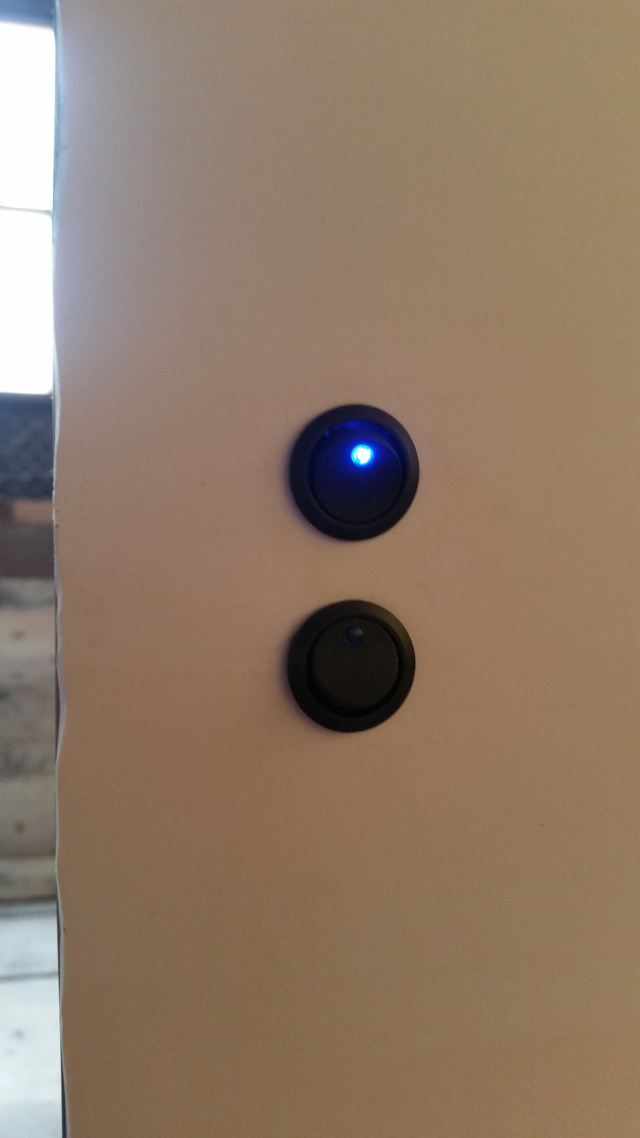
↑ light
switches just inside the door. Top is indoor lighting master, bottom is
outdoor (original fitting will be converted to 12V LED only).

↑ Each end
of the caravan has a warm white exterior grade, waterproof LED 5050 strip
light, controlled by a nearby rocker switch (so either end can be switched
on or off, after the main light switch is switched on).
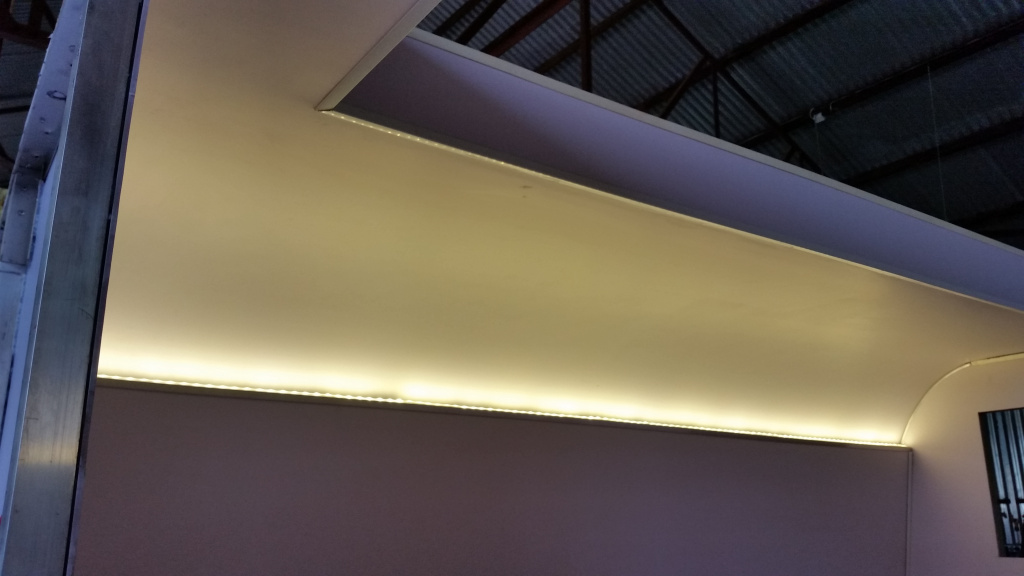
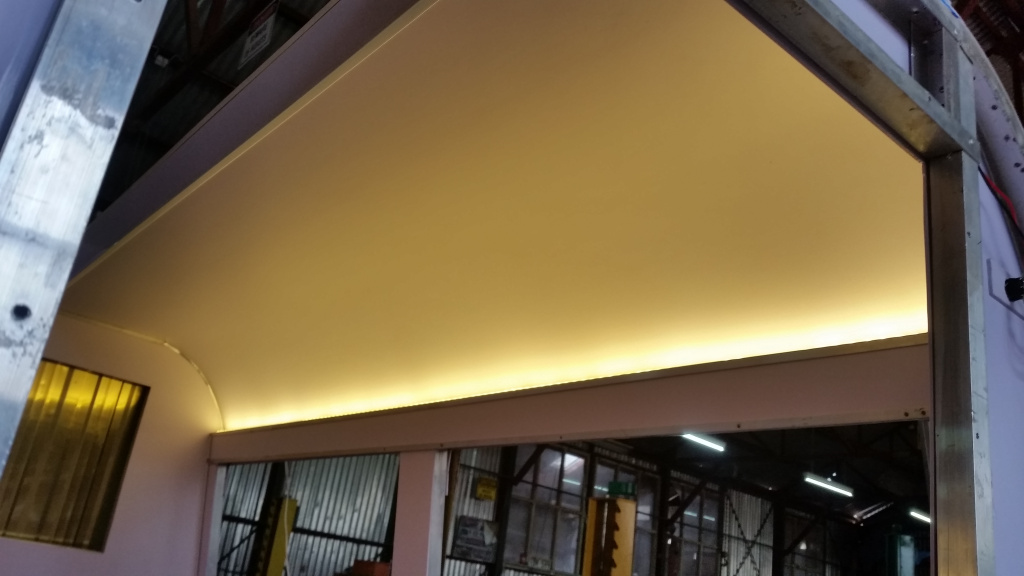
↑ Front and
back lighting respectively. LED strips simply face up and bounce the light
off the white PVC panelling for nice, even lighting.

↑ This shows
the input for the poptop-mounted solar panel via curly cord and
European-spec 'lighter socket', and the double USB power outlet on each side
of the caravan.
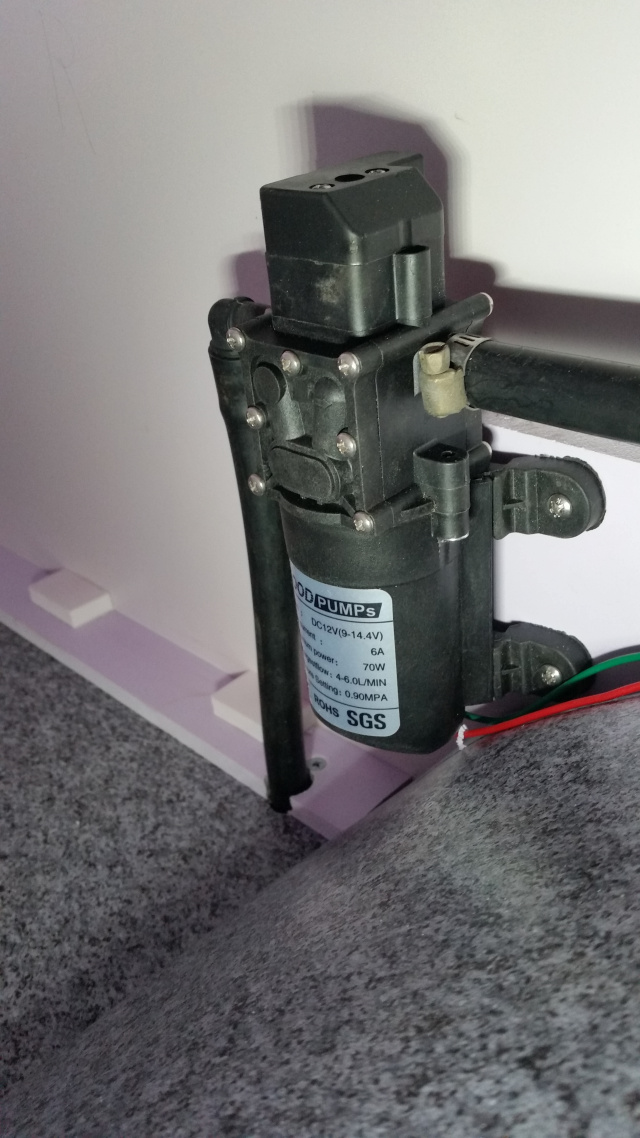

↑ Initially I wasn't
going to refit the original water tank, but the problem of the ugly hole in
the cladding where the water inlet was situated, and a bit of thought about
water for general purposes, made me decide to refit the tank, and fit an
inboard automatic pump that would supply a tap mounted on the
A-frame/drawbar. Raiding my parts stores, I decided to utilise a vintage
brass tap and fabricate a flared copper pipe etc. Quickly polished it all up
on the bench, and sprayed some clear lacquer over it. Just a silly, but fun
thing that beat putting on a new plastic tap...
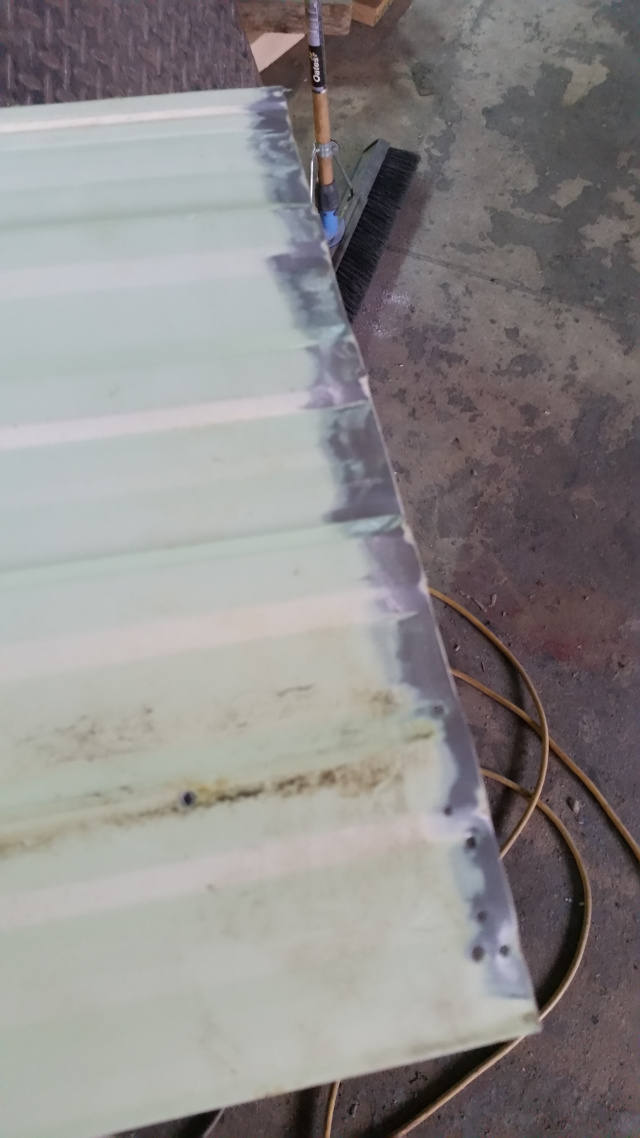

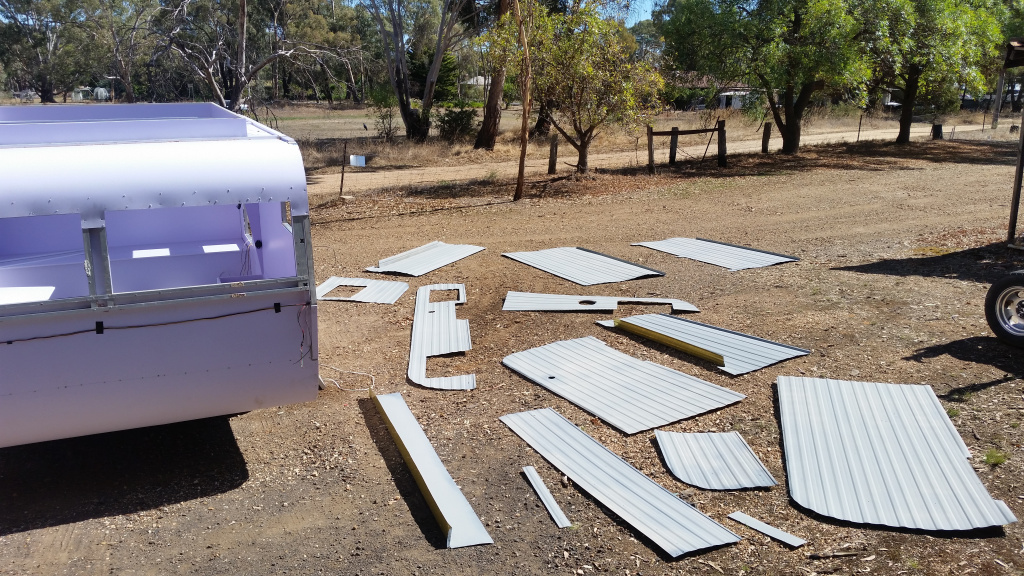
↑ I had
planned to simply put the exterior cladding back on as it was. Aged, a few
small dents here and there, etc. But as the rest of the rebuild was going so
incredibly well, I decided to spend even more time, and a bit more money,
just to get the outside nice and fresh again too. As I progressed, I knew
I'd made the right decision. Millard had used a hard putty on the exterior
edges, which was harder than concrete after 45 years! The only way to remove
it thoroughly was to initially, laboriously chip the bulk of it away with a
sharp chisel, and then finish with an angle grinder fitted with a poly
wheel. That stripped the original finish as well, which required etch
priming of the exposed aluminium.
↑
Some hours were then spent with a 'caramel wheel' removing all the original
vinyl pinstripes and various stickers, including the original dealer's
stickers.

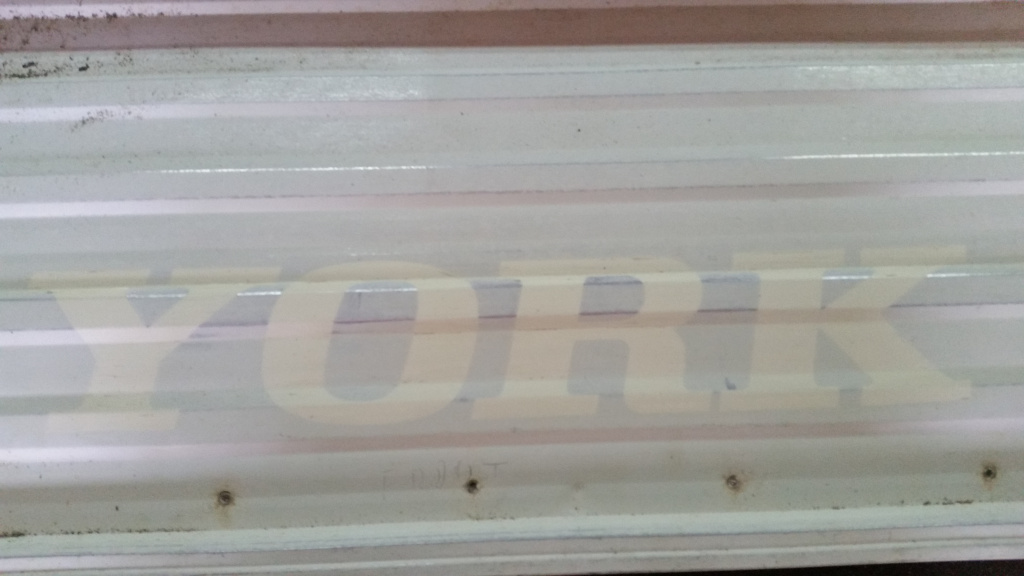
↑ Just in
case the vinyl lettering I ordered online, using the closest font I could
find (see below), I carefully traced the original YORK stickers before I
removed them with the caramel wheel (what an amazing tool!)
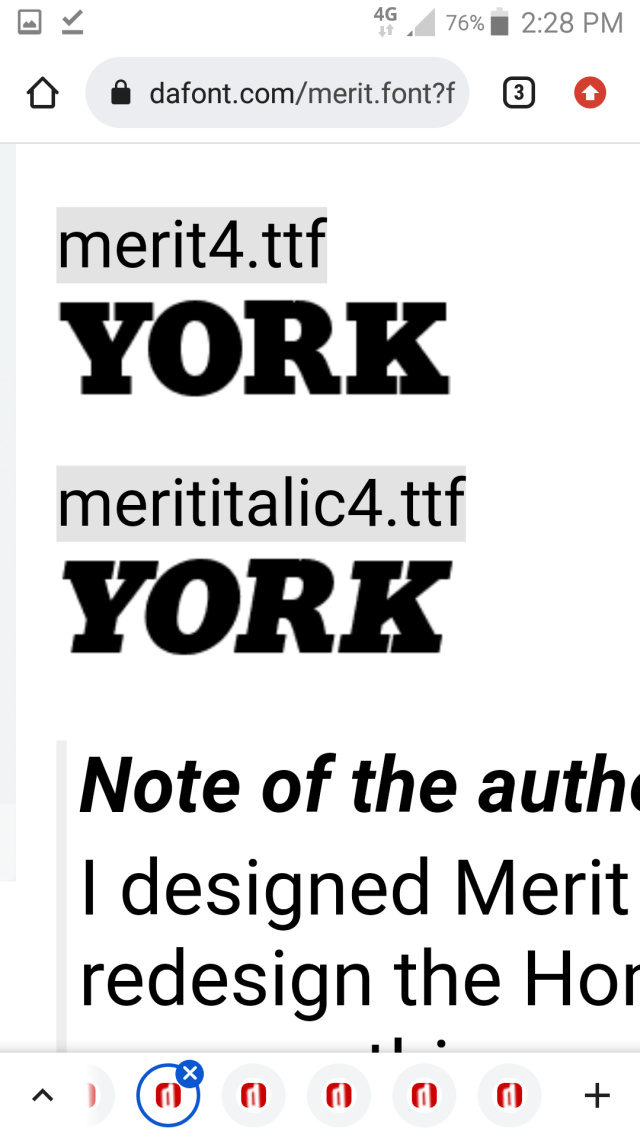
↑ This is
the closest font (the bottom italic one) after hours of browsing Dafont. Not
exact, but close. If I'm not happy with them, I'll cut my own by hand, using
my traced patterns.

↑ The
fibreglass poptop after a high-pressure cleaning to remove all ingrained
dirt, before spraying a primer/surfacer.
↑ all
original panels were carefully sanded and sprayed with primer/surfacer, with
these panels requiring subtle hammer-and-dolly rectification of minor dents,
before they all sat out in the sun to cure, while the caravan itself was
pushed out of the workshop into the sun to test the newly-installed solar
charging system. It performed perfectly!

↑ I then
the topcoats, using Dulux Super Enamel High Gloss after a lot of
thought and research. These vans have a particular Millard colour that I
find really appealing, and I wanted to replicate exactly. I had a Dulux
spectrometer mix done by the very professional folk at Dulux Ballarat, using
a part of a door panel that had never seen the light of day (interior, and
covered). The match finally arrived at by the perfectionist doing the mixing
was totally invisible when applied to the sample panel. The formula in this
pic is exactly what you will need if trying to accurately restore your York
or Millard from this period.

↑
After a bit of time away, busy with other projects while the newly sprayed
original panels had a chance to thoroughly cure, I came back to the job
today, finishing the wiring inside the wall cavity area, and then
positioning the end panels (using original rivet holes so everything lined
up) and built upwards to the crucial poptop roof area. Everything lined up
beautifully, do all my careful measurement, careful cutting and assembly is
paying off. Applied the original pattern triple pinstriping to the poptop,
which will soon have its solar panel, wiring, and new PVC foam board ceiling
fitted before being carefully placed back onto the caravan. Thank goodness
for my forklift for this exacting task.


↑ All
exterior panels (original, and resprayed in the original colour) are now
loosely riveted in place, using the original holes. Everything lines up
perfectly, so all good! Things are being kept 'loose' until the final full
rivet and seal, as I want access to the wall cavities until the last minute
in case of any changes to wiring, etc. The windows I thought were going to
be a quick clean and fit, but I have spent the last 2 days, dawn to dusk,
disassembling, repairing, re-rivetting, acid cleaning, nylon wheel brushing,
undoing and properly fixing previous owner and 'repairer' repairs, and then
finally refitting the original glass with new seals. Oh yes, a few
expletives were used to good effect as well.


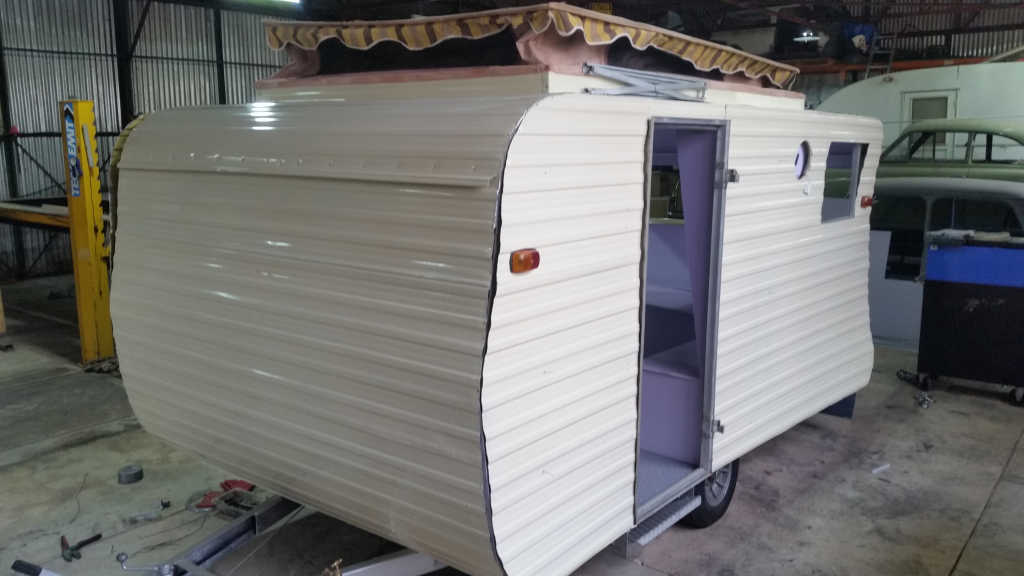
↑
Now that it's totally waterproof (for ever - guaranteed!) I didn't even
bother pushing it back into the workshop for the night. Exterior still needs
minor finishing off, stripes painted on the sides, YORK and Micro decals
made and fitted and a new padded vinyl stone guard sewn up and fitted on the
front. Interior just needs some edge trimming around the newly refitted
widows and door, new flyscreens made and fitted, and a tiny bit of
electrical work to finish off when the bits arrive in the mail. It was nice
to see the Lithium Iron Phosphate battery charging up nicely in the glorious
outdoor winter sun today (powering the LED lights for the dusk photo).
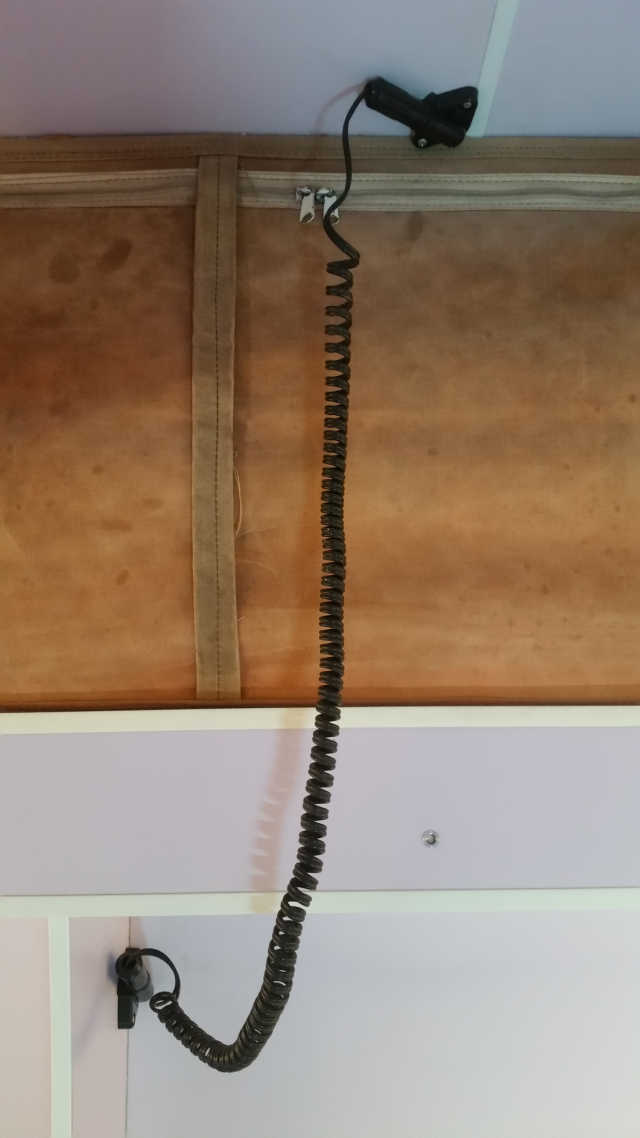
↑
The 10A curly cord I made up to connect the poptop (and its 40W solar panel)
to the caravan internal controller and 15Ah LiFePO4 battery, which plugs
either end into neat, European-style 'cigarette lighter' connections (much
neater and much more reliable contact than the usual style here in
Australia), mounted inside the ceiling and on the top of the adjacent wall.
Neat and effective.
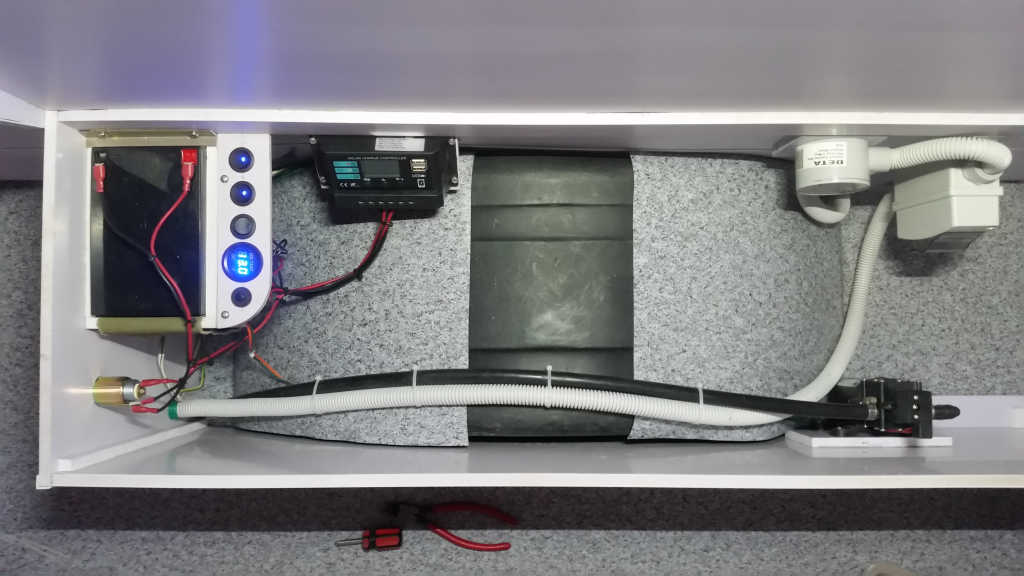
↑
The 'utilities' area under the right hand enclosed bench seat, using the
wheel arch area that is virtually useless for storage. Clockwise from top
left is the battery, its switch panel, the solar controller, incoming 240V
AC supply with 16A RCBO in an external grade waterproof housing, which feeds
just a double (and dual pole) powerpoint out of view on the bottom left, and
the 12V water pump (bottom right) which supplies the outdoor tap on the
drawbar from the original underfloor tank.
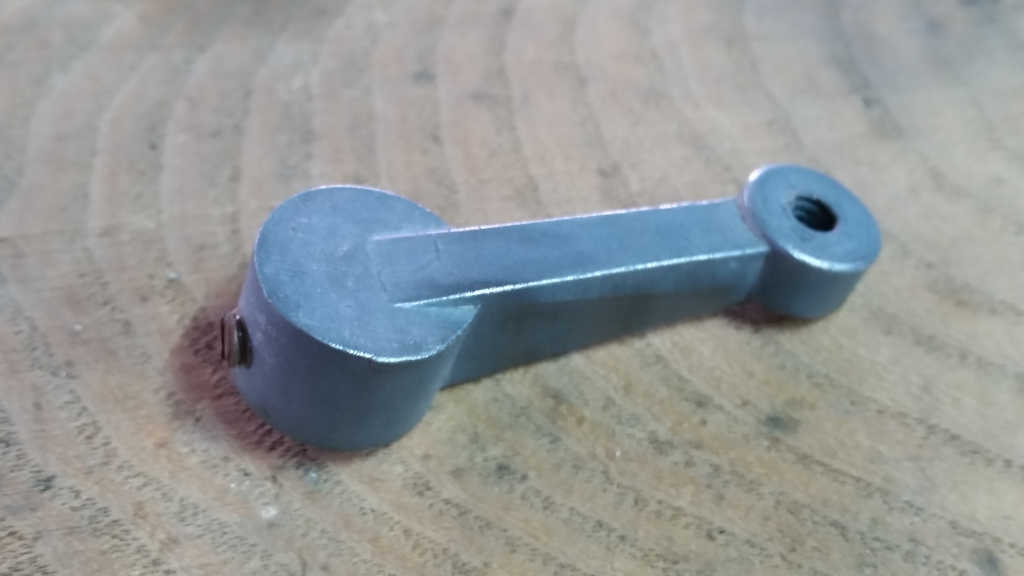

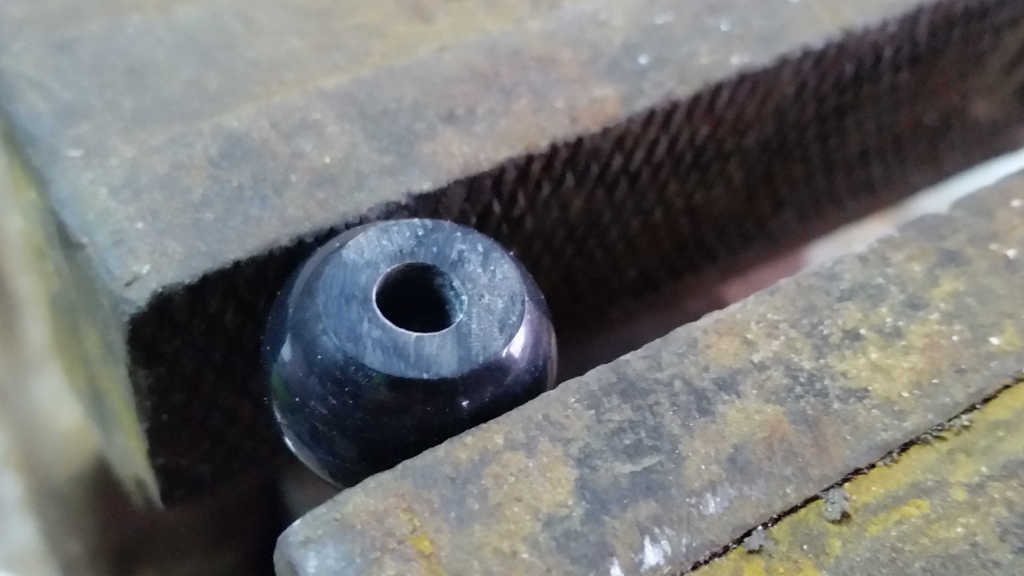
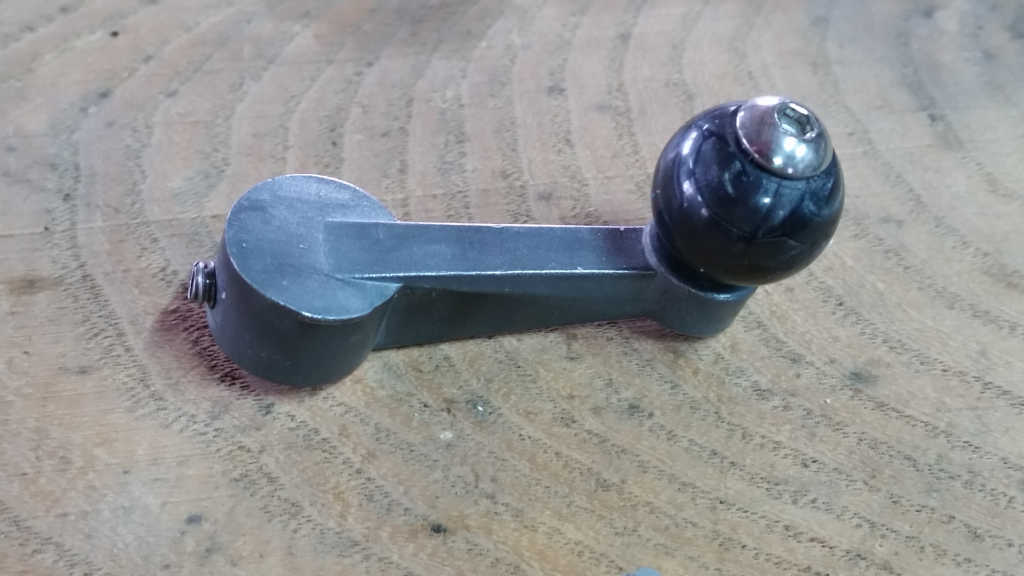
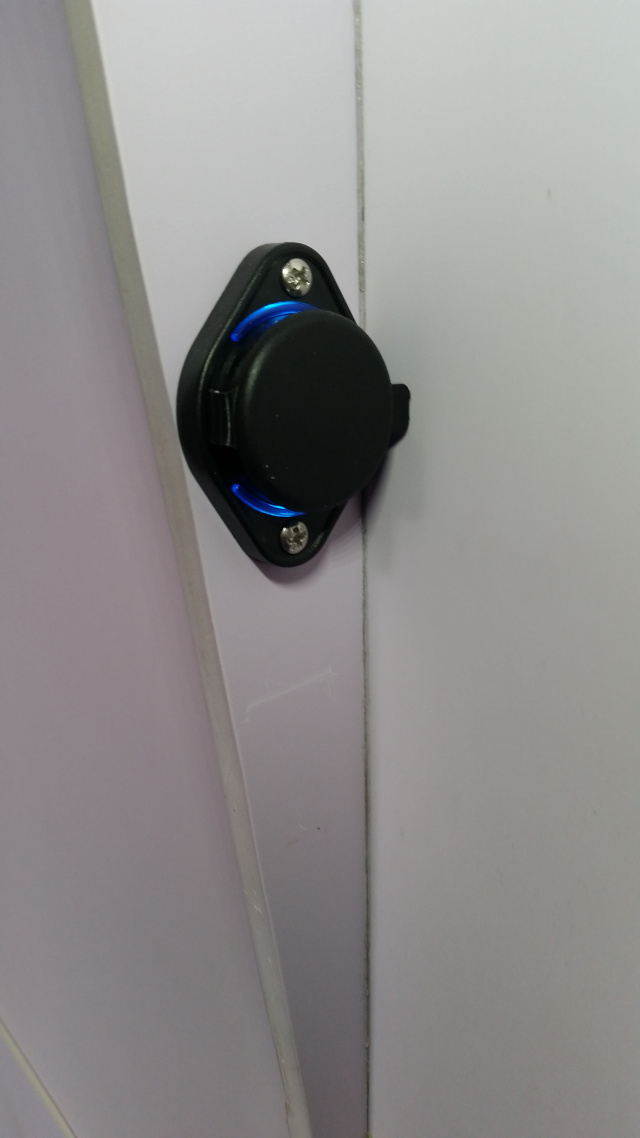
↑
The original window winders all (except one) had the knobs missing. The
price of replacements was ludicrous, and they were probably not anywhere
near the quality of the originals, which, other than the fact they'd lost
their knobs after 45 years, were actually a good quality metal with nice
grub screws. So, I thought laterally, and purchased a set of nice plastic
beads for a few dollars on eBay. Then it was just a matter of drilling the
hole a bit bigger to suit the stainless steel, domed-head allen key screws I
had in the workshop, filing a flat area on top of the bead so the domed
screw head effectively continued the curvature of the bead, and simply
assembling the two onto the original handle. I only used 5, so might
eventually find a use for the other beads!


↑ stripes (in
the colour of the most likely towing vehicle, the
Isuzu Beavertail), and decals carefully replicating the originals really
set it off!
↑ the usual
'Kelly St Classics' detail treatment.

↑ a few
interior pics in daylight, with poptop up and interior LEDs on.
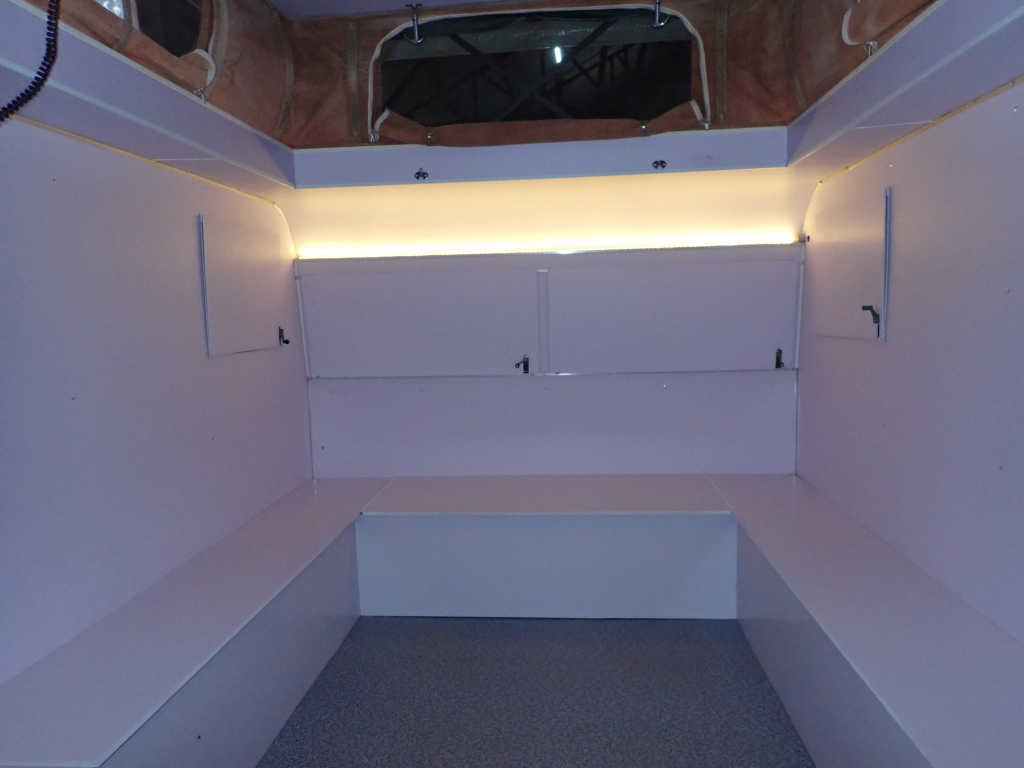

↑ and a few in
near darkness (dusk) in the workshop. These also show the blockout window
coverings I made from 3mm PVC foam board offcuts. Simple and effective (more
details below).

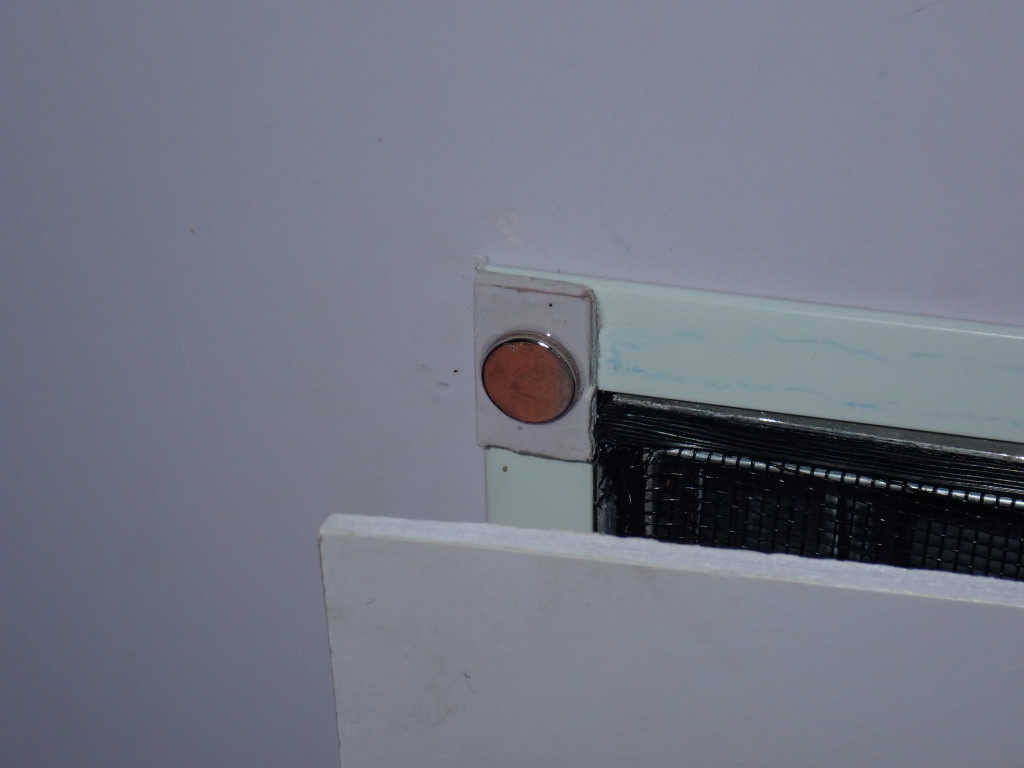
↑ the
window blockouts sit (on their bottom edge) in simple brackets I fabricated,
and then simply snap into place on the top using 10mm diameter (1mm thick)
neodymium magnets bonded to both the covers and the frames. Very positive,
very quick.
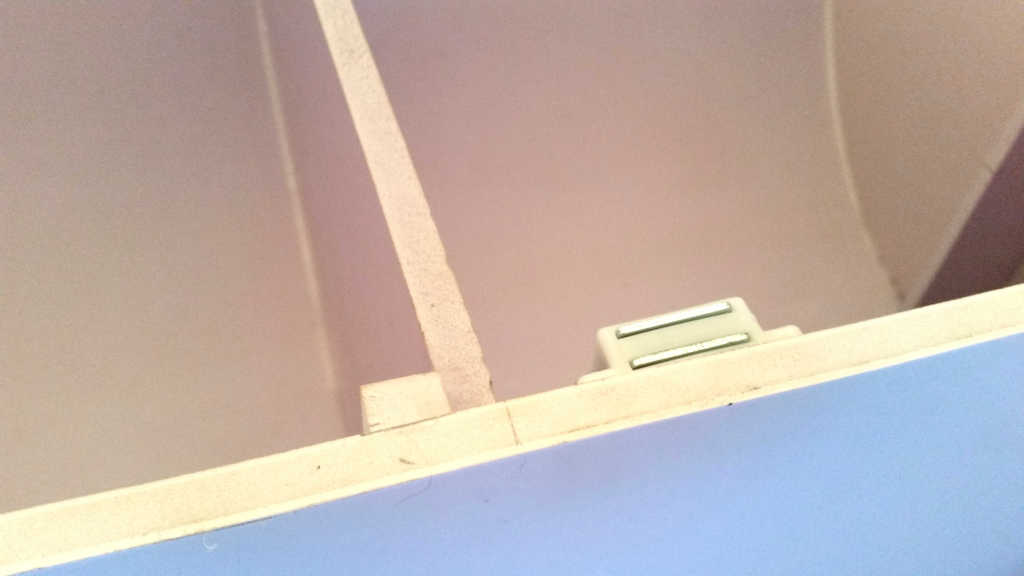
↑ I
decided to use simple magnetic catches to ensure the seat bench tops stayed
down while travelling (4 on each top), which give a nice, instant, positive
latching effect.
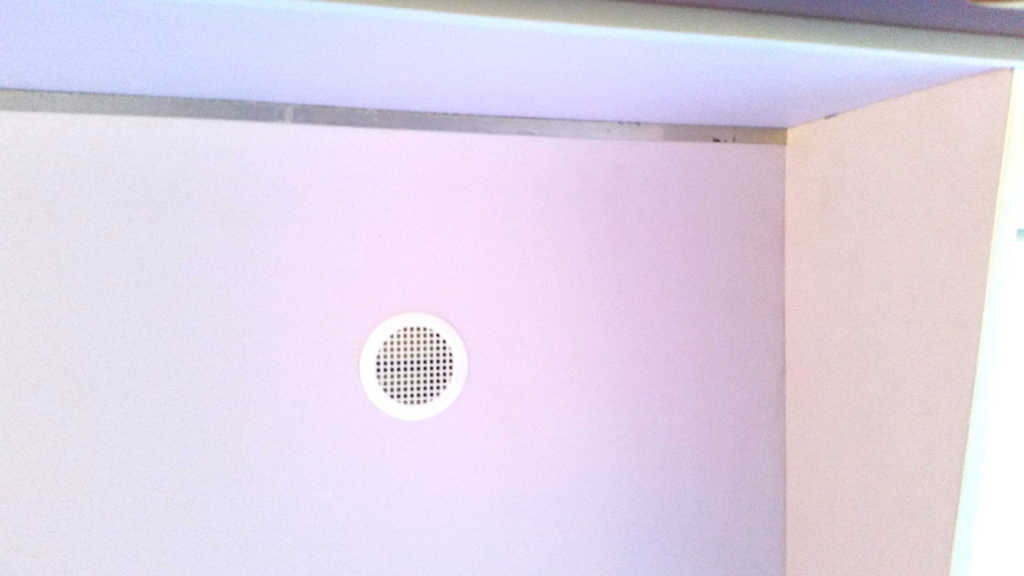


↑
Because the interior PVC wall panelling and exterior original aluminium
cladding were carefully installed on the aluminium frame to be totally
water-proof, and therefore virtually air proof, any condensation forming on
the inside of the cladding during cold conditions would be trapped, and
would doubtless cause problems with mould etc. The simple - only - solution
was to introduce ventilation into the wall cavity, which I did internally
rather than externally so that dust, small insects etc wouldn't enter the
cavity from outside. Ten 50mm circular vents were installed (three on each
side wall, and two in each end wall) which look neat and will prevent
condensation moisture building up. (In fact, many problems people put down
to leaks are actually caused by condensation, rather than leaks.)
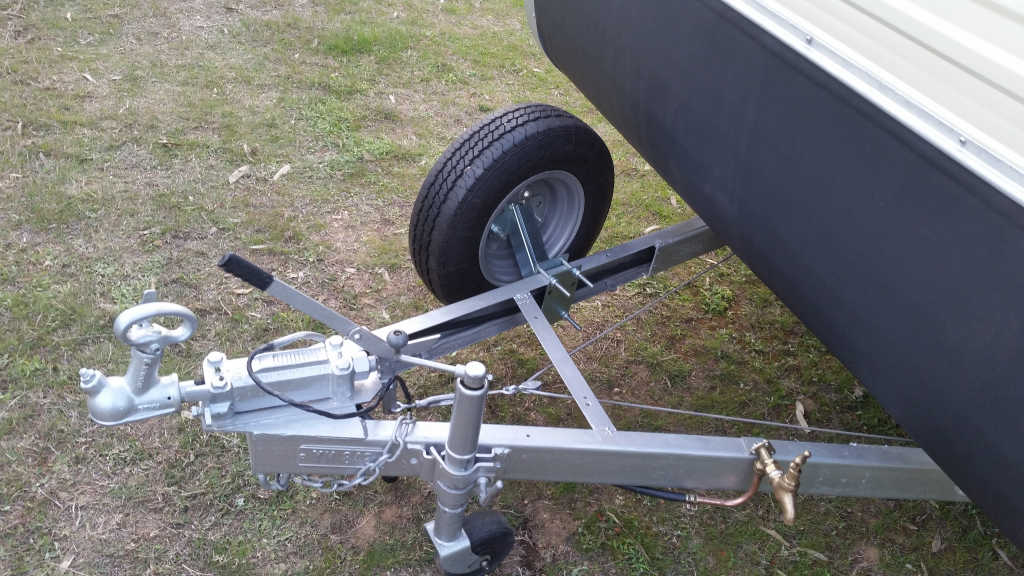
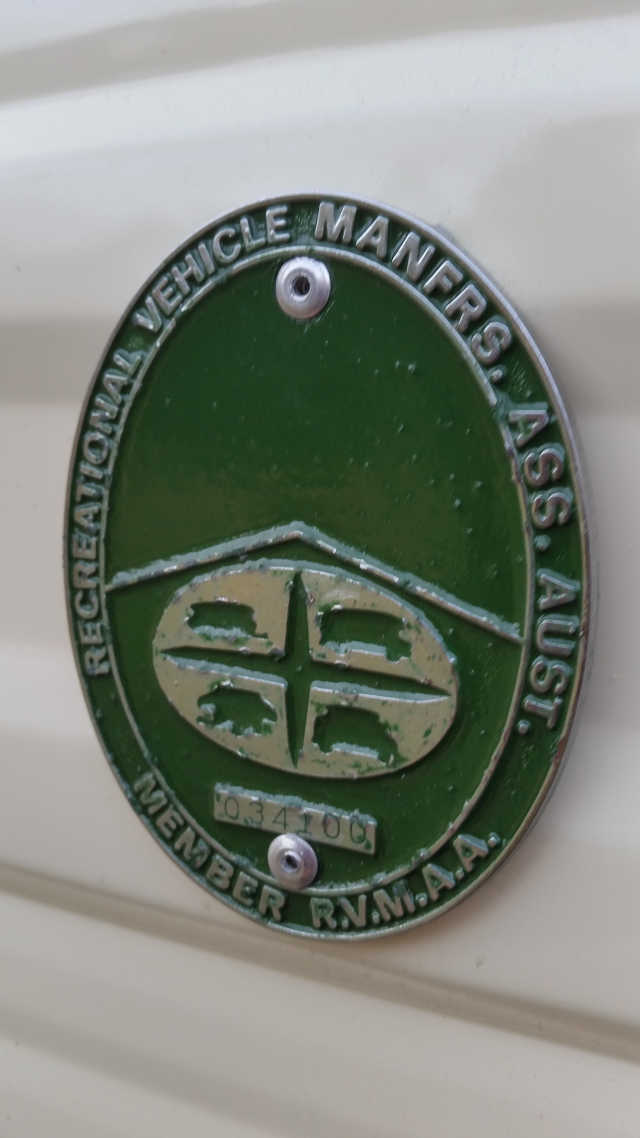
↑
A couple of detail shots - the drawbar mounted external tap, and the
original RVMAA badge repainted and reatt5ached in its original rivet holes.
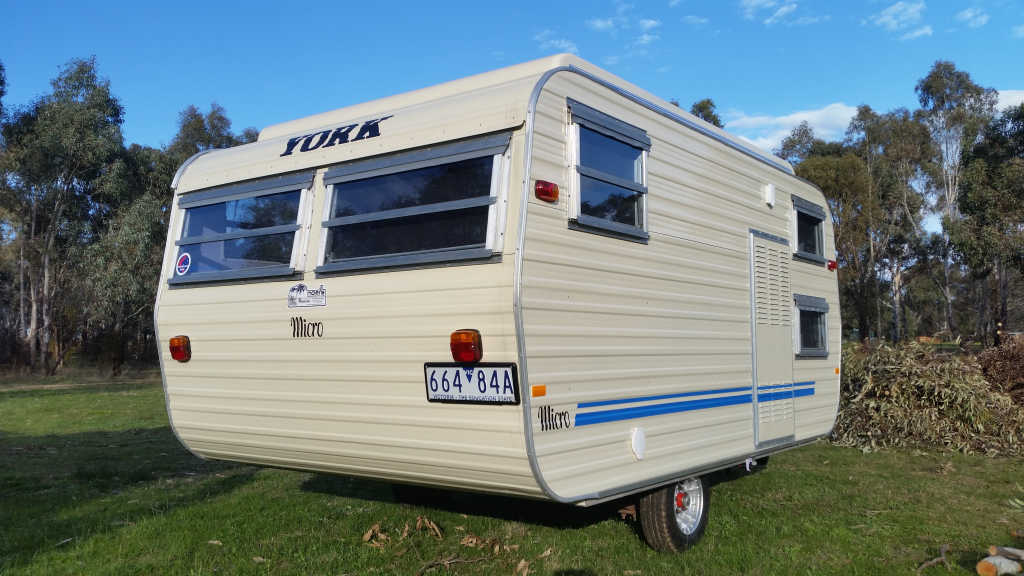

↑
With huge thanks to Rob Frost, General Manager at
Noel's Caravans
in Pooraka, South Australia, where this van was sold new, replacement decals
were posted to me to provide the finishing touch to the restoration!
↑
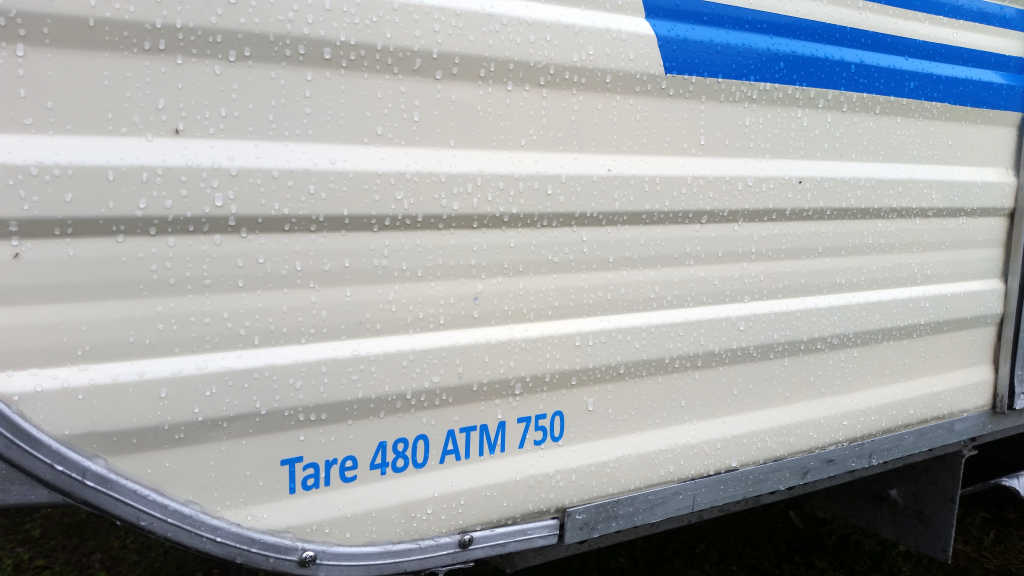
Just 480kg empty over the weighbridge!
And that's it for the rebuild! Click here to return to the caravan's main page.