Holden 202 engine custom built for 1973 Bedford CF Dolphin campervan
Here are some
photographs of the changeover engine being prepared and installed in
January 2018. The 'old' engine had been specifically built by a
specialist engine reconditioner in Bendigo in 2012, but I decided to
build another 202 with a counterweighted 'Blue' crankshaft). The
'old' 202 had only done 40,000 careful kilometres.
This time I built the engine from scratch myself, using my favoured machine shop (O'Brien A.M.S. in Kerang, Victoria) for all machining and preparation to the block, crank and rods.

Here the previous engine is about to be removed. The entire front subframe, complete with engine, gearbox and all steering and suspension, is unbolted from the chassis, then the body is carefully lifted high enough to allow the unit to be dragged out underneath. I use an engine crane with seat belt webbing directly onto the strong front aluminium bullbar for this, in small increments, carefully adjusting stands under the chassis rails as I go just in case something horrible happens! I do all this work solo, so care and patience is the key.
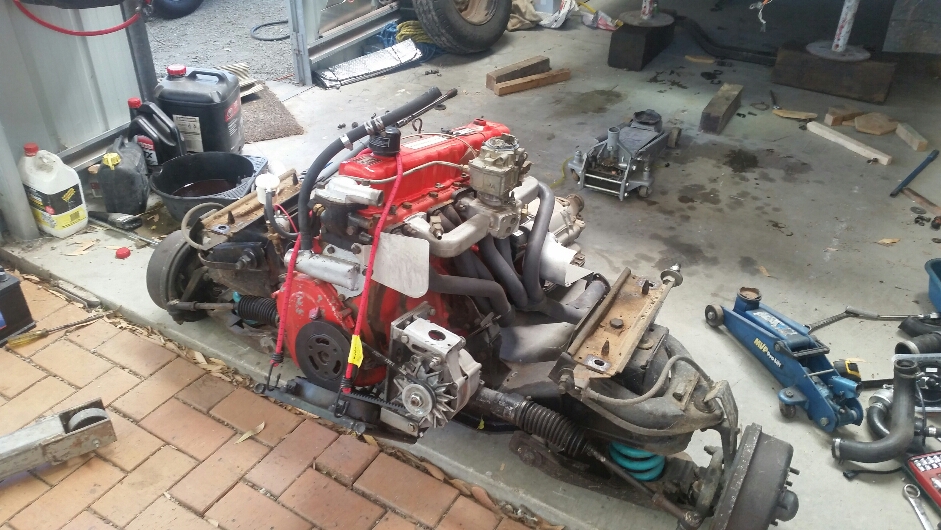
The subframe removed and safely clear of the vehicle (the stands can just be seen in the background).

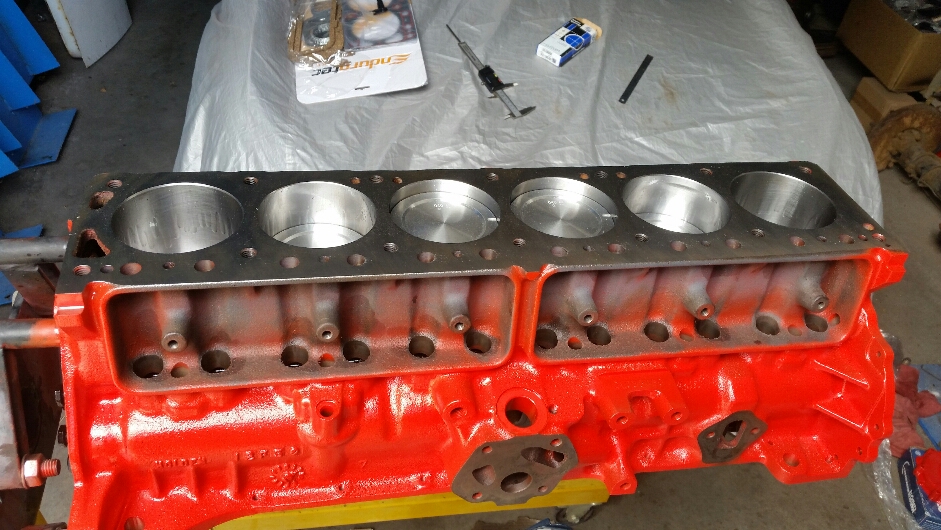
The rebored (0.040" oversize), cleaned, decked and crack-tested Holden 202 'red' block repainted in the correct colour and mounted in the engine stand.
Crankshaft, camshaft, pistons and rods all carefully fitted. A lot of time was spent properly preparing and sizing the rear main 'rope' seal to allow the crankshaft to rotate freely but seal effectively. High compression pistons, a carefully selected camshaft to suit the engine's usage in the campervan (wide powerband but also economy with good breathing at the sustained high RPM of hours of highway running with the relatively low gearing necessary for the camper). I don't like using assembly paste unless an engine I'm building won't be started for a long time after building, preferring to use liberal amounts of engine oil during assembly. (I also crank the engine without spark plugs fitted and with the sump correctly filled with fresh oil when the engine is first installed, until I get oil pressure showing on the gauge, which means the engine is not initially started with compromised oil delivery).
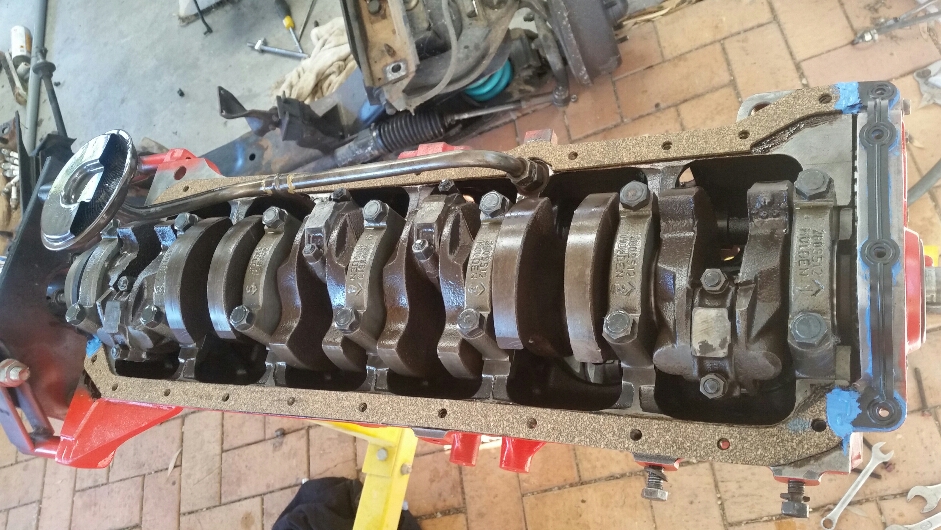
Here's the upturned motor at this stage, clearly showing the fully counterweighted 'Blue' crankshaft and matching stronger conrods which will make this 'Red' 202 smoother and stronger.

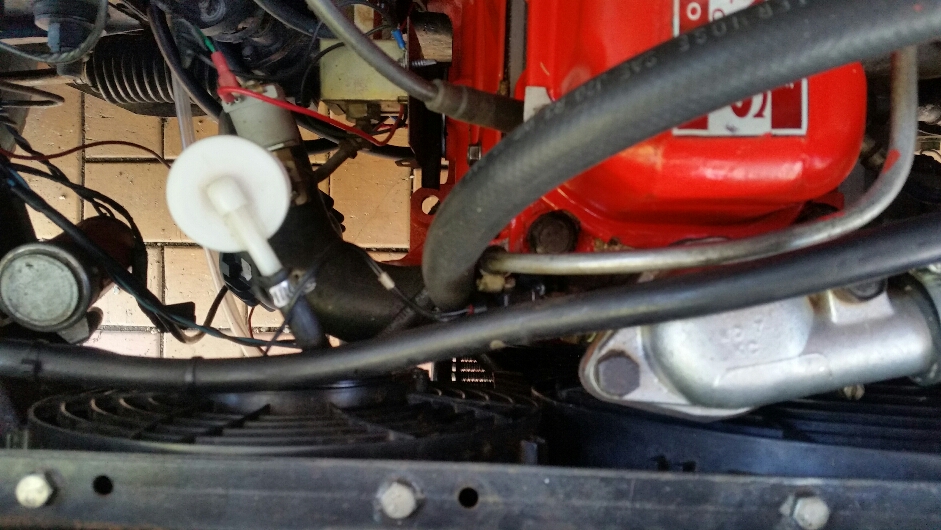
This shows the electric petrol pump I use with the dual-fuel setup, no points in the distributor (I use and highly recommend 'Powerspark' conversions which I fit to all my classic cars), the remote oil filter conversion which uses the more common Z9 element and also is put through a thermostatically-controlled remote oil cooler with its own thermo fan which keeps engine oil at the ideal temperature (not over-cooled, and not over-heated with sustained high-speed use in hot Australian conditions). The distributor was also previously fully reconditioned and custom calibrated to give the ideal advance curve for LPG, which this Bedford uses much of the time.

Cylinder head, valve train (with new hydraulic lifters of course) and front water connections fitted. I use the original 'thermostat housing', but it contains no thermostat, as all pumping of coolant and operation of cooling fans is electrical. No engine-driven pump or fan using horsepower needlessly all the time, and the electronic system (all Davies Craig) uses the sensor visible just under the aluminium housing and regulates pumping speed and cooling fan operation automatically - a great system!
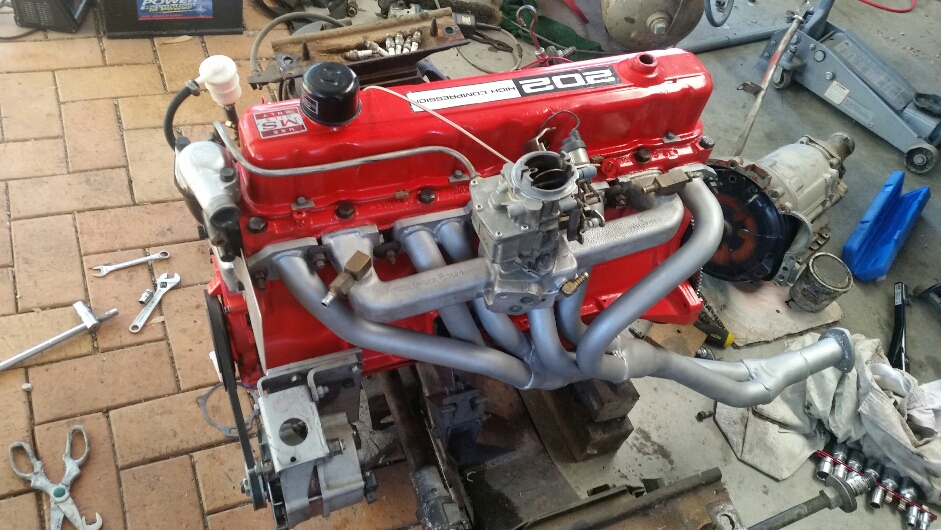
The other side, showing the extractors, carburettor and the custom mount I built for the high-capacity alternator, the only thing now driven by the engine pulley.

Detail of the alternator bracket. Also note the aluminium heat shield which prevents excessive exhaust system heat being radiated directly onto the back of the left-hand thermo fan - these are extremely close in the very tight confines of the CF engine bay with the custom 3-row radiator I had made for this vehicle (old school brass and copper - I'm not a fan of aluminium radiators with cast iron engines for basic chemical reasons!)
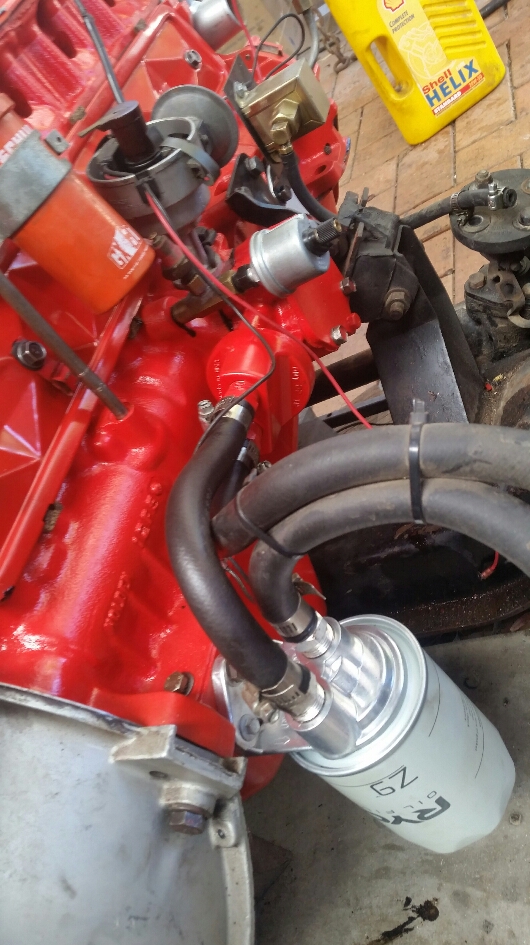
Trimatic all bolted up, with the flexplate and torque converter carefully torqued to spec. Also clearly visible is the remote oil filter conversion (with the filter fitted vertically for much less messy changes than the stupid original horizontal orientation). Note the T-piece conversion on the oil gallery outlet which enables both the original oil light and a VDO oil pressure gauge to be used (I'm a stickler for good instrumentation letting me know what's going on!)
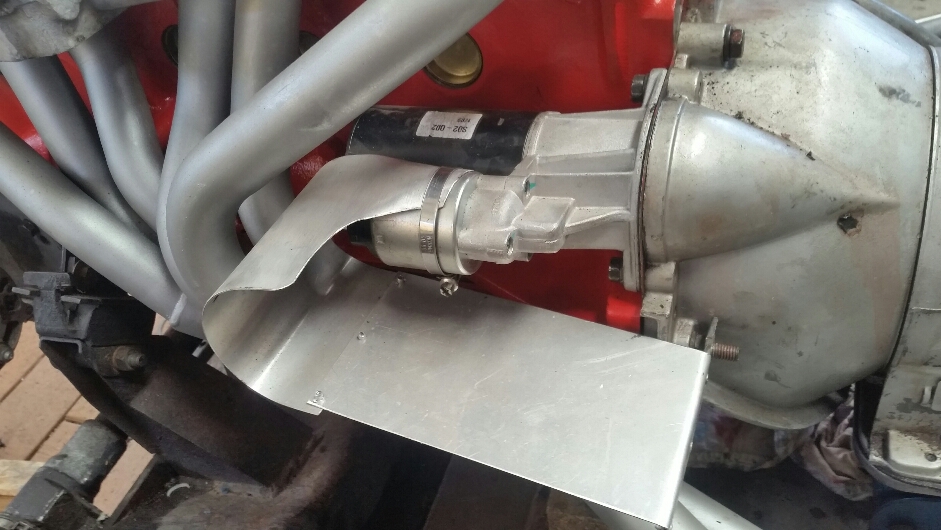
Starter motor fitted - note the heat shield I made out of aluminium sheet (yep, offcuts from Dolph's camper body) which protects the solenoid and wiring from direct radiated heat from the extractors. Just some simple reliability insurance.

Engine now reinstalled in the engine bay. The entire front sub-assembly was wheeled back under the elevated body, which was then carefully and slowly lowered accurately into position and bolted up.
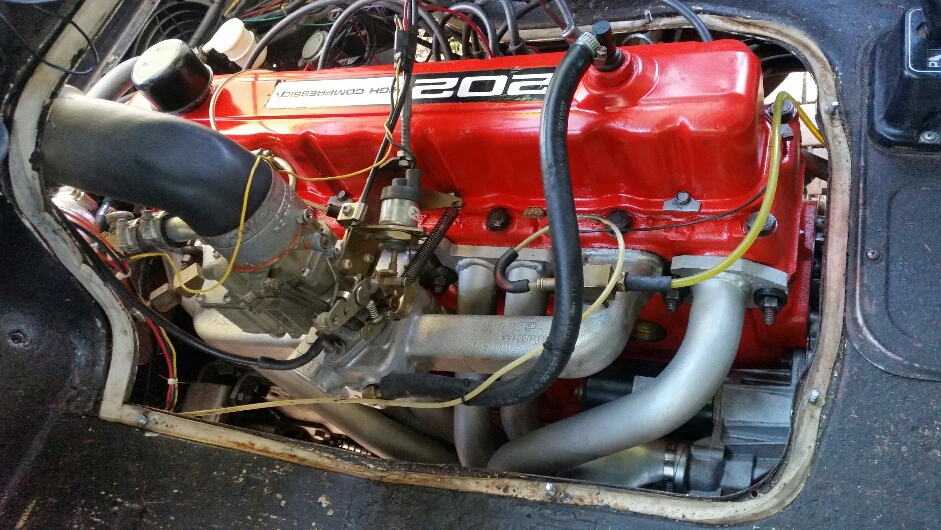
View from the other side. Vacuum hoses, accelerator and choke cables and wiring connected - these will be all neatly tied when initial testing confirms all is well and I don't have to pull it all out again!
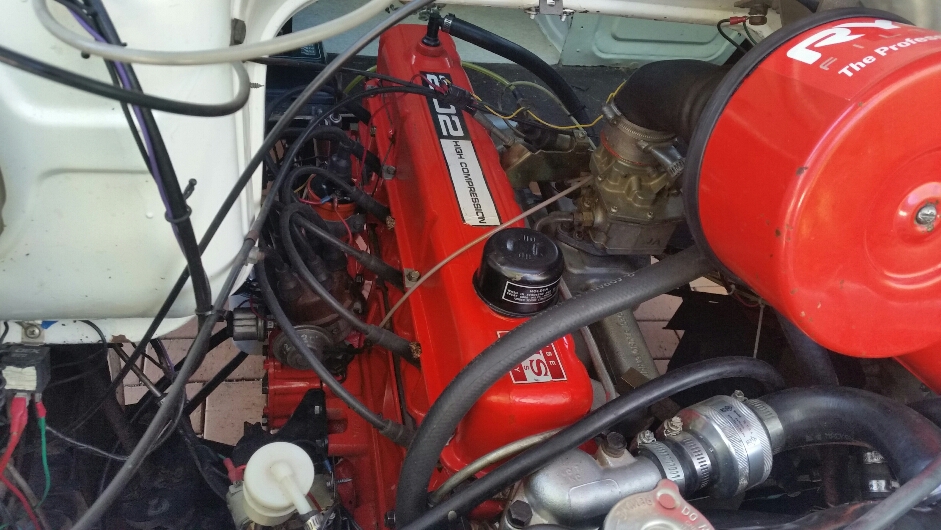
The usual view of the engine from the front, under the bonnet.
This gives a hint of how tight everything is up the front! 3-core radiator, thermo fans and even the transmission oil cooler can just be seen.
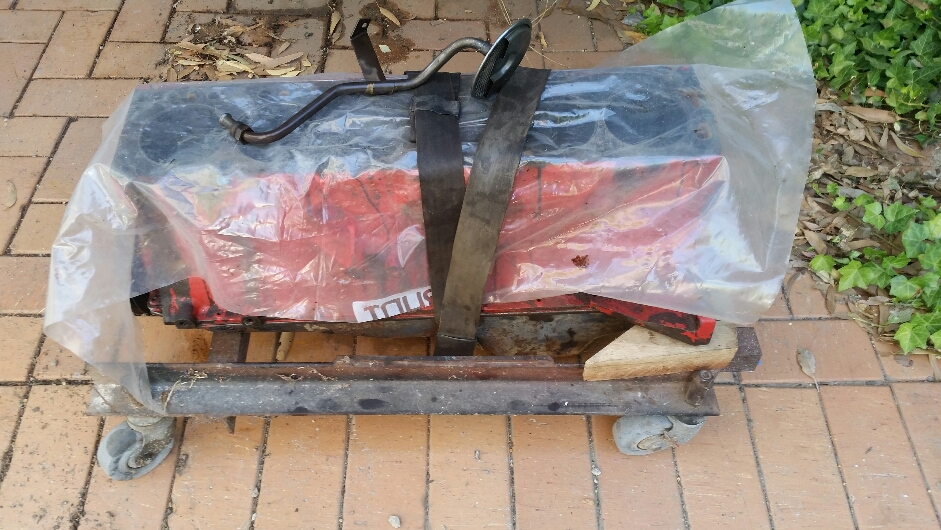
The 'old' engine on a
trolley. It ran well, with good compressions and even oil pressure,
and the bores and internals all look pristine (as they should for an
engine that's been nursed for 40,000 country kilometres as this one
has). I'd been keeping this for 6 years in case I could use it in
another project, but I now realise that won't happen, so this
engine, and the 173 High Compression cylinder head that were
specifically chosen and reconditioned at the time, will soon be
offered for sale.
Photos of the restored vehicle can be seen here, while some photos of the rebuild can be seen here.