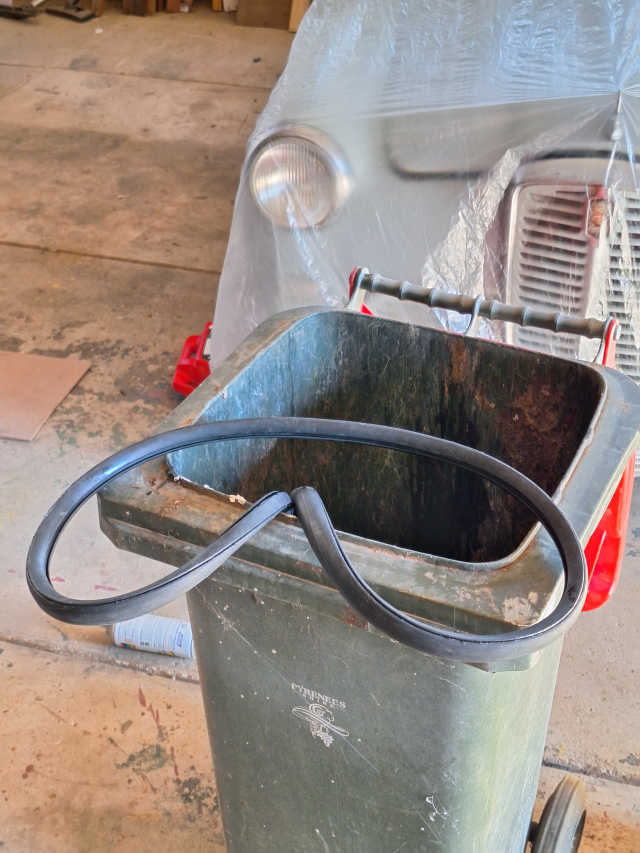
↑ To start at the end, this is where the front seal ended up. In the bin. After hours and hours of frustration.
After the body had been fully repainted, the time came to refit the glass, using new seals.
I had purchased the new rear seal some years ago. I can't remember where from,now, but I noted it was too large, so obviously for a later, Rover Mini. That was no issue, as the profile was correct, and it's a simple matter to cut the seal at the join, accurately cut it to the correct length, and reglue it.
So I did that, and ordered a new front seal from my usual supplier. That's when the drama started...
I have chosen not to identify the retailer who sold me this rubber, as this product (I now know its source) is sold by others as well. However, I know of several other people who have purchased this seal from this retailer, and have had exactly the same experience. The retailer has since done the right thing (after seeing this page), and given me a refund for the seal (but not for the postage, but all good). More importantly, the product has been withdrawn from their stock, and they are taking the issue up with the supplier.
Edit
15/04/20245; A good news story!.
After a lot of research and discussions with various restorers,
dealers and suppliers, my new seals arrived this afternoon, and,
within a couple of hours, were completely, neatly fitted. And that was
with full application - before fitting the glass and filler
strip, - of good, old-fashioned non-setting mastic in the glass
and body grooves, and subsequent cleaning up with a plastic spatula
and rags soaked with suitable solvent (I throw nothing out, so used
40-year-old petrol drained from the tank of a 1962 Austin A40 Farina
Countryman I'm also working on, and won't even ignite in my 1950 Grey
Fergie tractor that normally runs on anything, to dissolve the
remaining mastic without affecting the paint - it might take days of
long, hot, deep baths to remove the distinctive aroma from the skin on
my hands!)
I'm glad I decided to opt for both front and rear screens, as the
seals from Rubber
Seals Australia are of superb quality. Not only is the extrusion
itself of unbeatable quality, and exactly the right shape, but the
quality of the almost imperceptible join, and the beautifully dense,
pliable, high-quality rubber were as good as I've ever seen.
I will write to proprietors Richard & Kathy Schneider, and
employee Jessica, to thank them for everything, and I know where I
will purchase any future rubbers they may have in stock (it's a pretty
wide range) for my ongoing restorations.
Now, to share the unfolding drama, and hopefully prevent you experiencing the same. Check the seal you are buying thoroughly before making payment!
↑ To start at the end, this is
where the front seal ended up. In the bin. After hours and hours of
frustration.


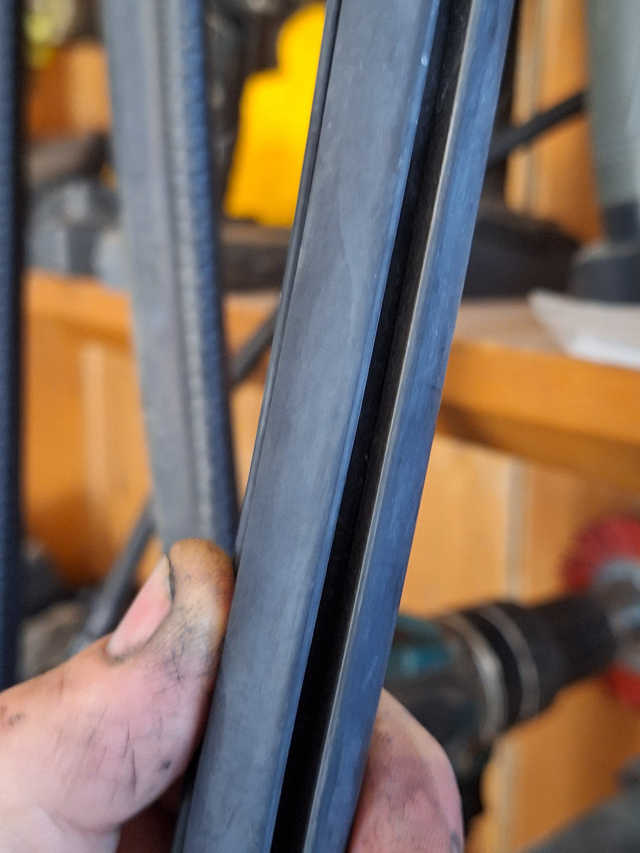
↑ This was the problem. Despite
copious application of soapy water, pressure, gentle prying, and every
other trick in the book, hours of trying failed to insert the bottom
edge of the new 5mm laminated screen into its channel, once the seal was
located in the body. The wider of the 2 channels in these photos is the
body seam side (!), while the glass channel is the completely closed
over channel.
↑ By contrast, this is the
window channel of the rear seal I had purchased some years back.
Obviously able to accept the window glass.
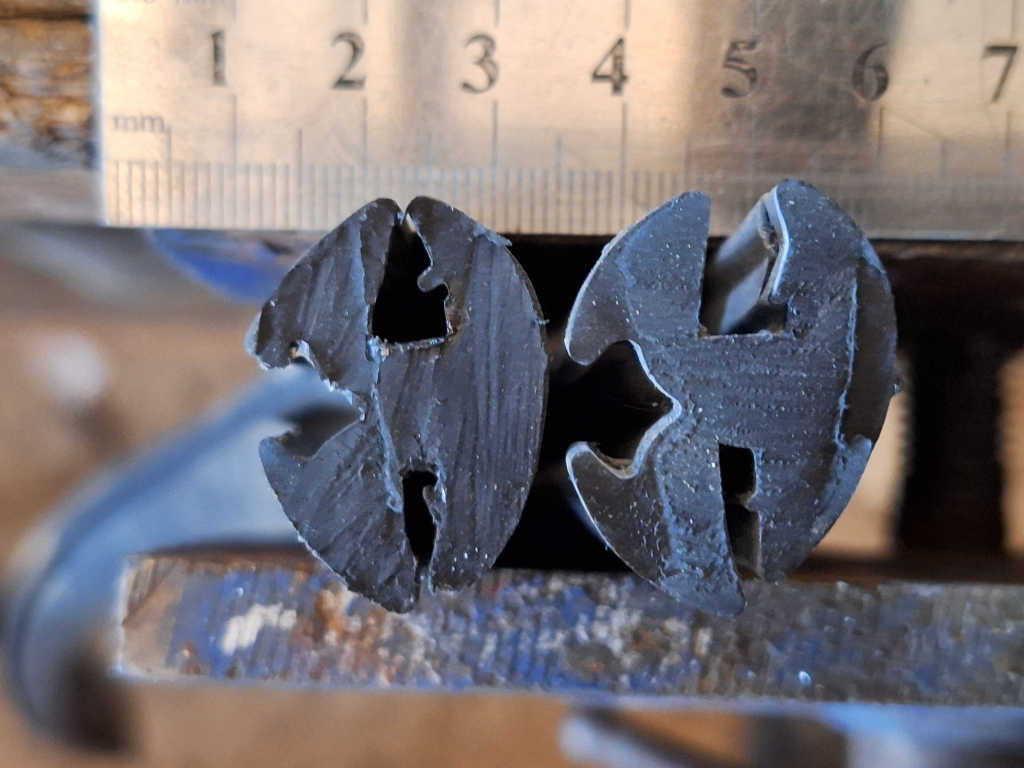
↑ Cutting the bad front seal at
the join (which was a badly made join in any case), it was clear when
looking at the two profiles what the problem was.
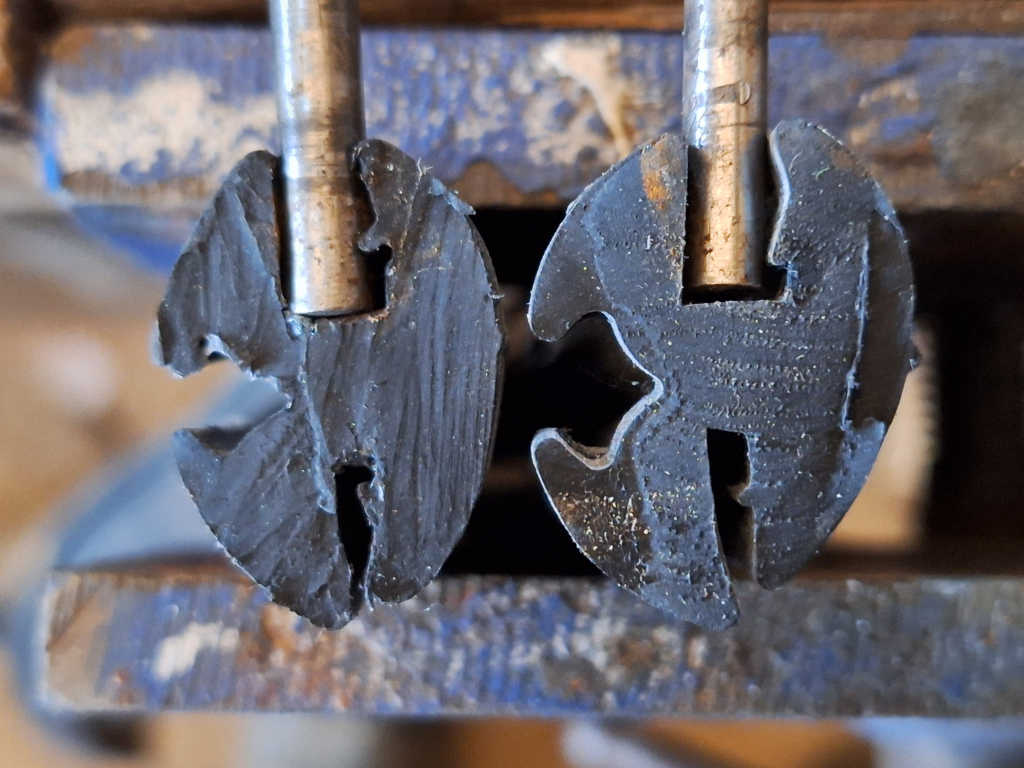
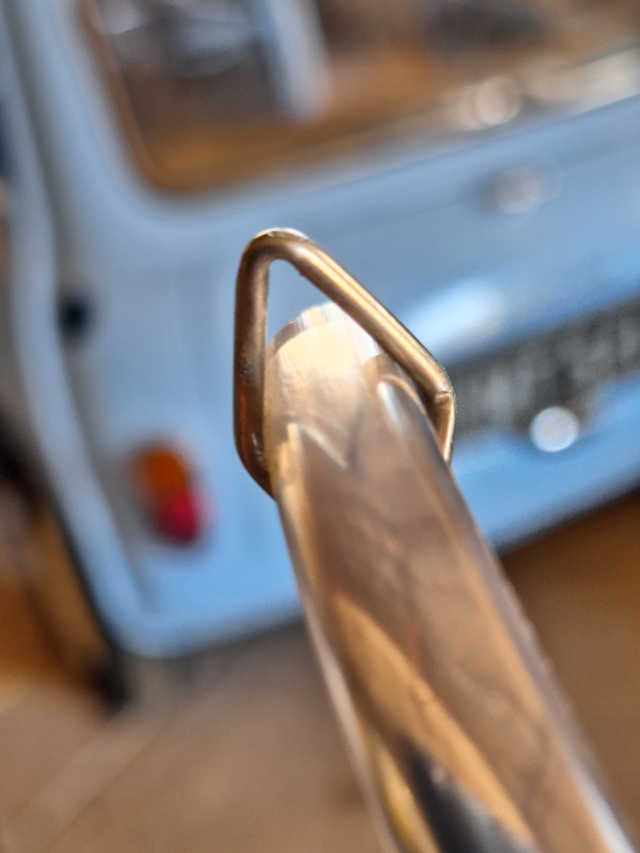
↑ Here I have inserted 5mm drill
bits into each seal profile. The good seal accepted the bit with ease,
and held it in position. The other seal needed the drill bit to be
firmly pushed into position, and you can see how that results in the
channel for the lock strip narrowing, which points to further issues. I
then decided to 'train' the channel on the faulty rubber to accept 5mm
glass, by forcing the full length over the edge of some 5mm plate steel,
which I left out in the sun for a couple of days. I then reglued the
ends (after properly squaring them up and linishing them) for a 2nd
attempt.

↑ While I waited for the front
seal to 'train' to a usable shape, I fitted the rear window. Even being
extremely cautious, and taking my time, the glass was in its new seal in
20 minutes.
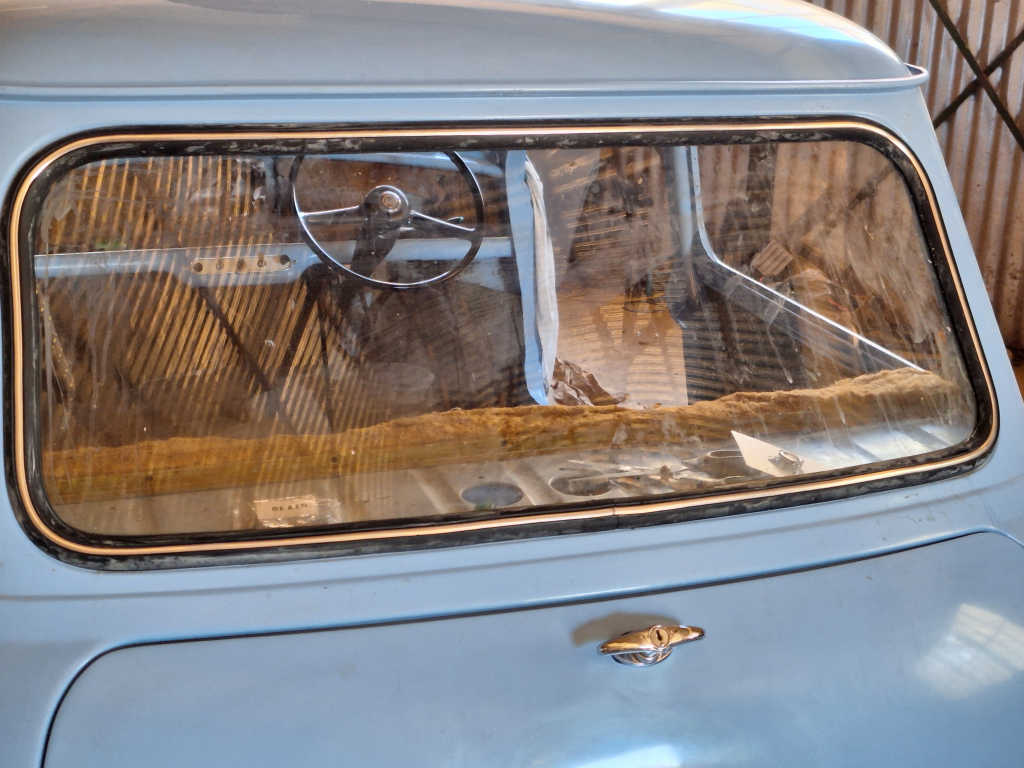
↑ 12 minutes later, the 'chrome'
filler strip was also installed. A doddle.
↑ This tool (from the same
supplier) did the job of inserting the filler strip well, but only after
being carefully modified in a vice, as it was way too wide to fit into
the groove. By carefully squeezing it until it just fitted the filler
strip through it, the tool was great.

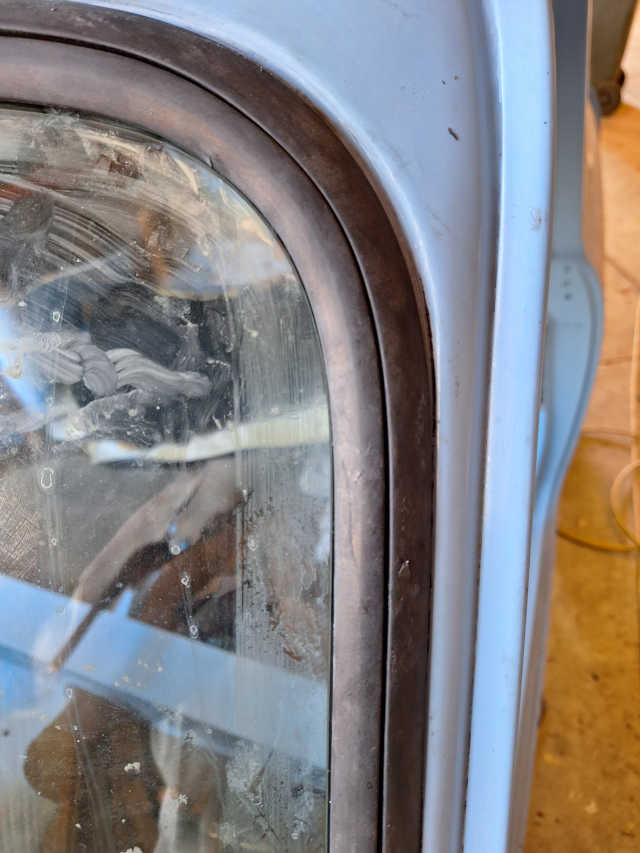
↑ After the pleasant experience
with the rear screen, it was time to return the the windscreen. The
newly 'trained' seal had been accurately reglued (much better than when
it was supplied), and refitted into the body aperture. Finally, after
several hours, I did manage to get the screen to drop into its channel,
and then slowly massage the lip around the rest of the screen, using
lots of soapy water spray, the correct tools, and plenty of patience.
↑ As feared, after finally
getting the glass into the seal (much, much too difficult to be
acceptable), the filler groove had closed right up. I spent some hours
trying to fit the filler, but it was ridiculously tight, and was simply
impossible around the bends.
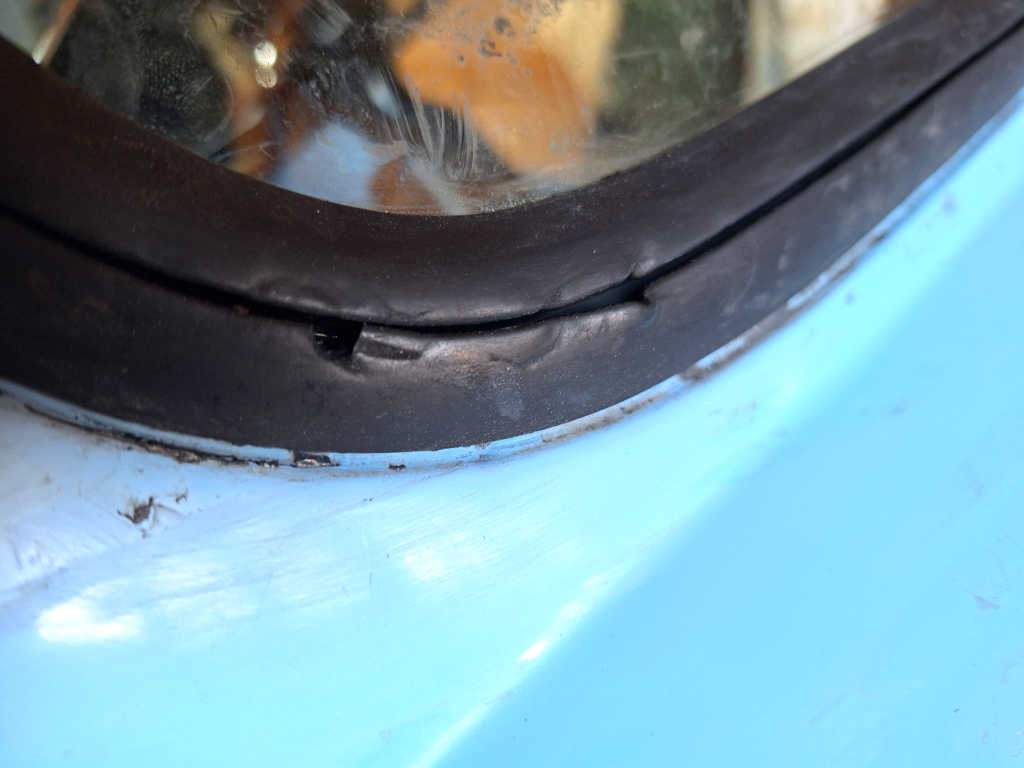
↑ No matter how much care was
taken, the shear force needed to force the filler into the closed-over
groove resulted in the edges tearing at the corners. By this time I had
wasted in excess of 8 hours of hard, frustrating work on this faulty
seal, compared to the pleasant half hour successfully fitting the rear
screen.
↑ Which brings us back to where
we started. Rubbish thrown in the bin, where it belonged in the first
place.
I hope you have found this helpful!